


Horses are useful mobs in Minecraft that allow you to traverse great distances while saving both time and your hunger bar. While they can be tied to a fence post with a lead to keep them from running away, that method provides neither protection nor storage for their supplies. Instead, I’ll teach you how to make an easy horse stable that contains space for everything you need for your horses.
Table of Contents
Materials List for Minecraft Horse Stable
The resources used for this build are relatively easy to obtain, with the stone bricks being the most time-consuming to create. While they can be swapped for cobblestone, they provide the build with a certain charm that is well worth the time spent.
The required materials include:
- Stone Bricks –
- Stone Brick Stairs –
- Stone Brick Slabs –
- Oak Logs –
- Stripped Oak Logs –
- Oak Planks –
- Oak Slabs –
- Oak Fences –
- Oak Fence Gates –
- Lanterns –
- A shovel for path-making
Building the Exterior of the Horse Stable
The exterior of the stable will be built in three main parts. The first part covers the basic structure of the walls, while the second discusses the roof and the third covers all of the extra details on the outside.
Stable Walls Tutorial
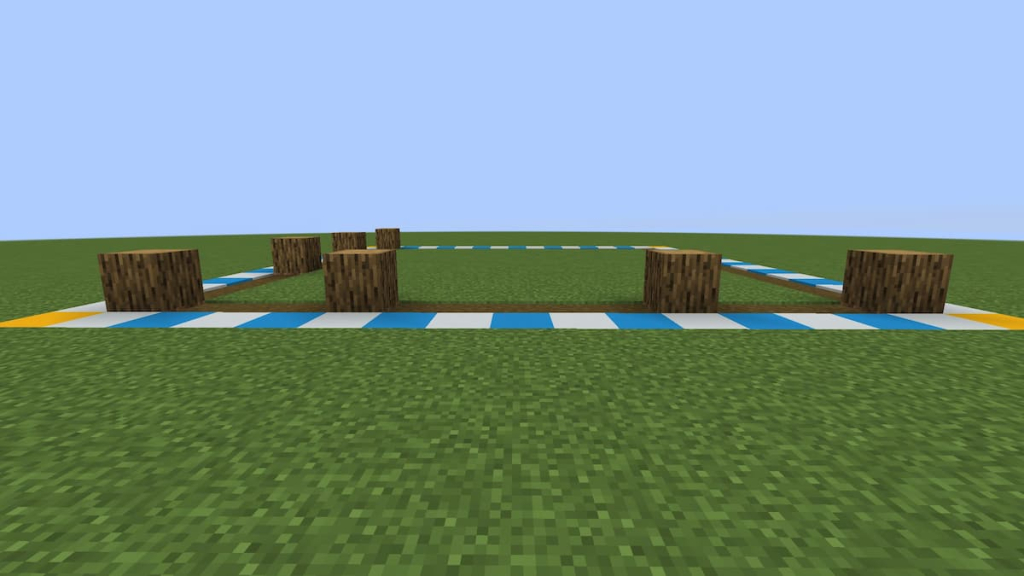
The horse stable will need a flat surface measuring 15 blocks wide by 15 blocks long.
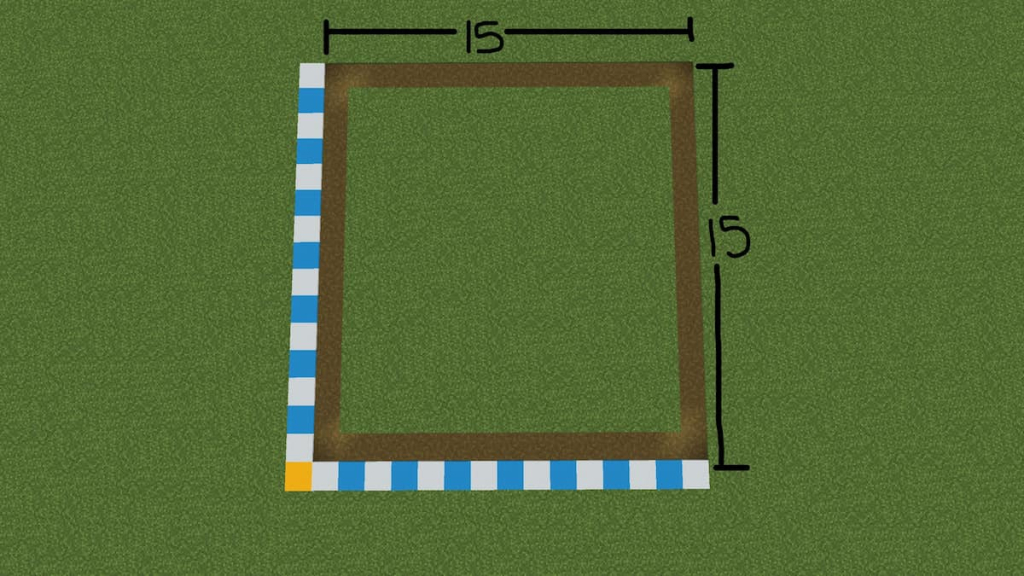
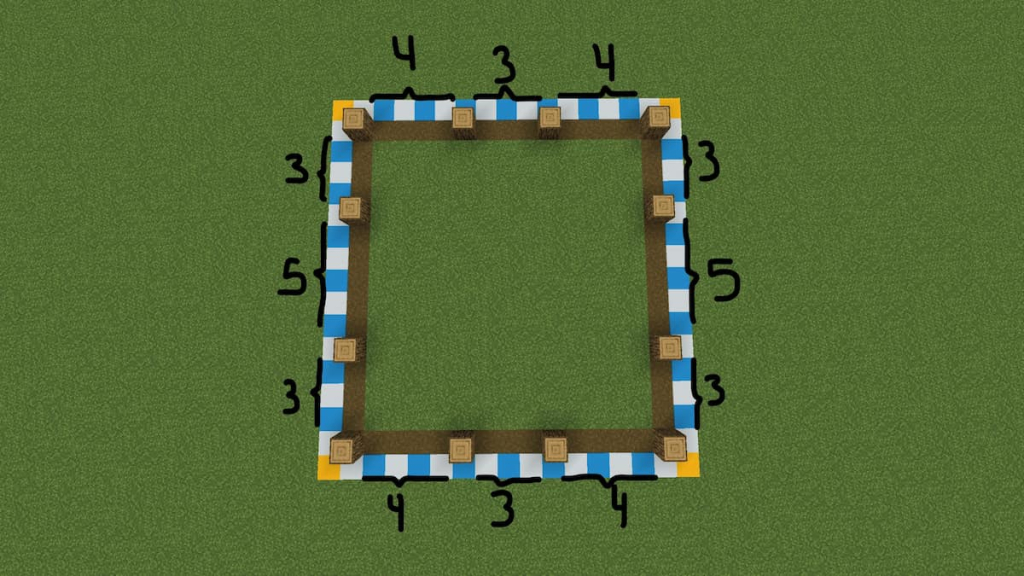
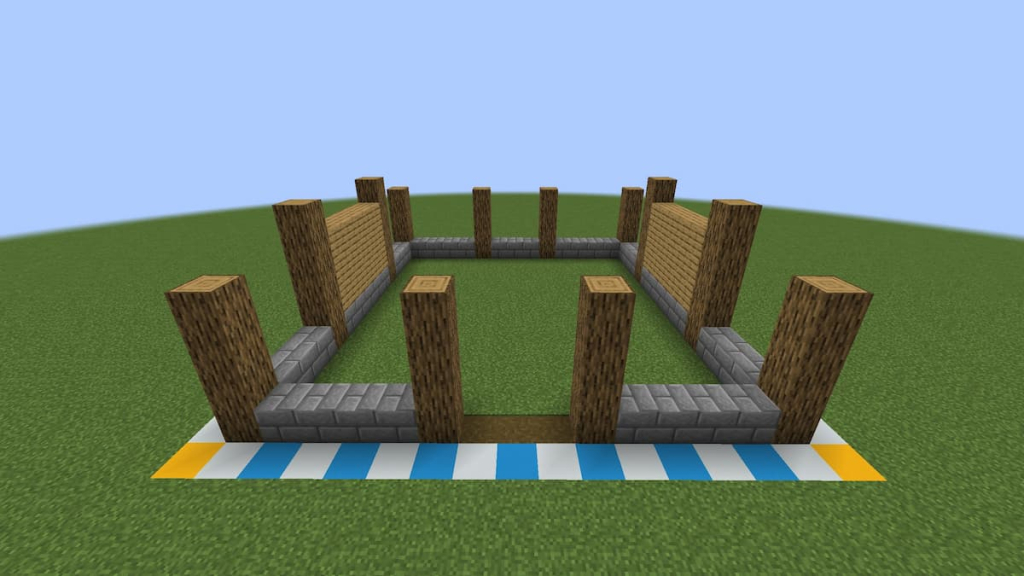
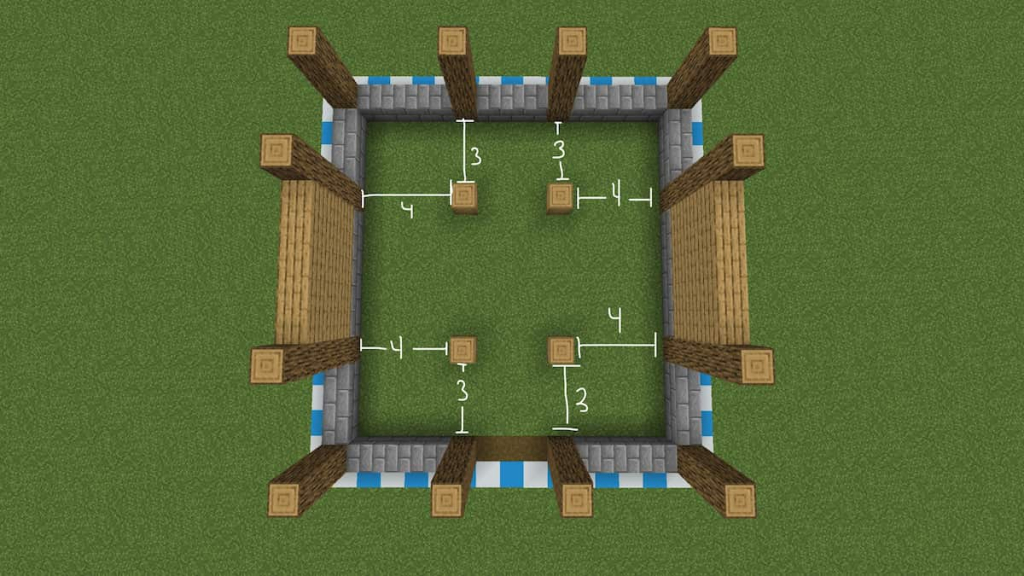
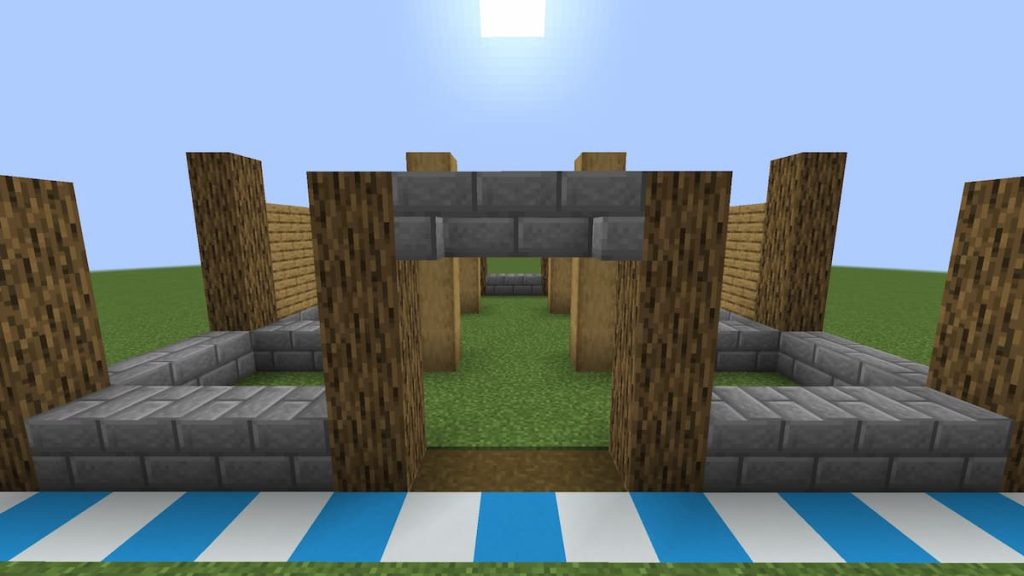
On the front side of the stable, begin the walls by placing an oak log at each corner of the square. On the left side, place another oak log on the fifth block away from the corner. There should be four empty blocks between the newly placed oak log and the oak log on the corner.
Repeat this process on the right side. There should be three blocks of space between the two logs in the center, which will become the stable’s entrance later on.
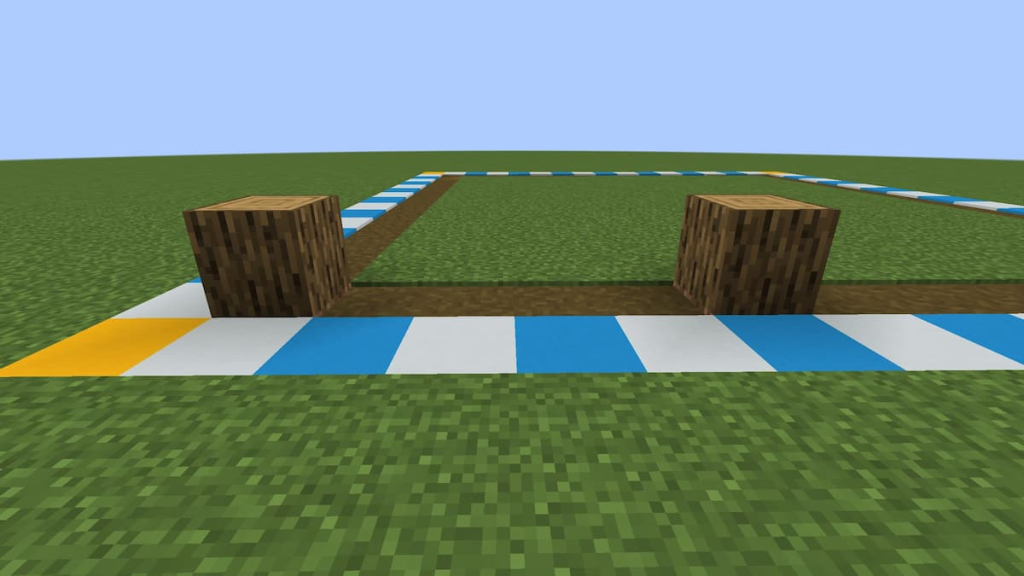
Head over to the right or left side of the horse stable. Start at one of the already-placed corner blocks, then skip three spaces and place an oak log on the fourth.
Copy this on the opposite side of the same wall. There should be three spaces between each corner log and middle log and five empty spaces between the two center logs.
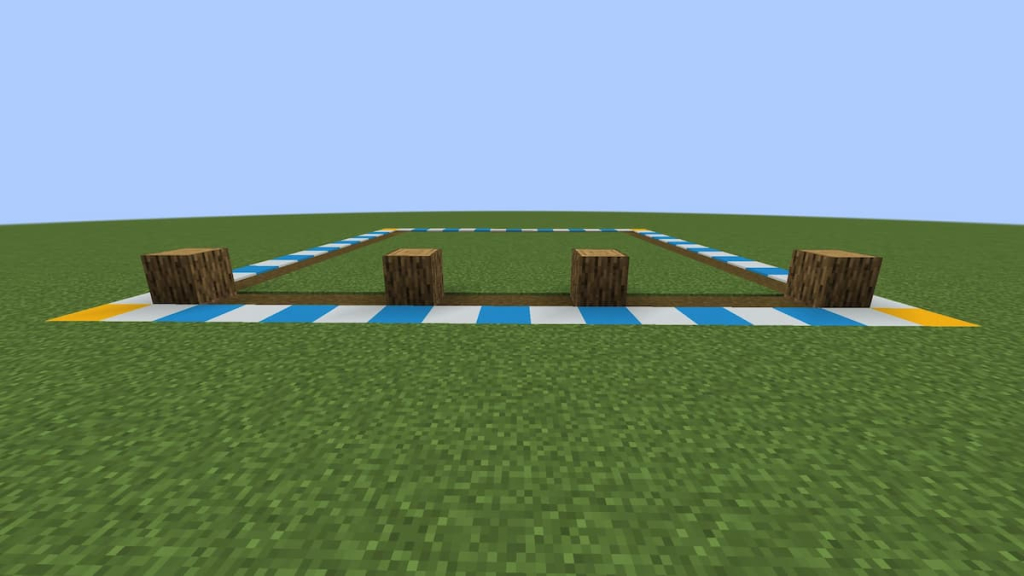
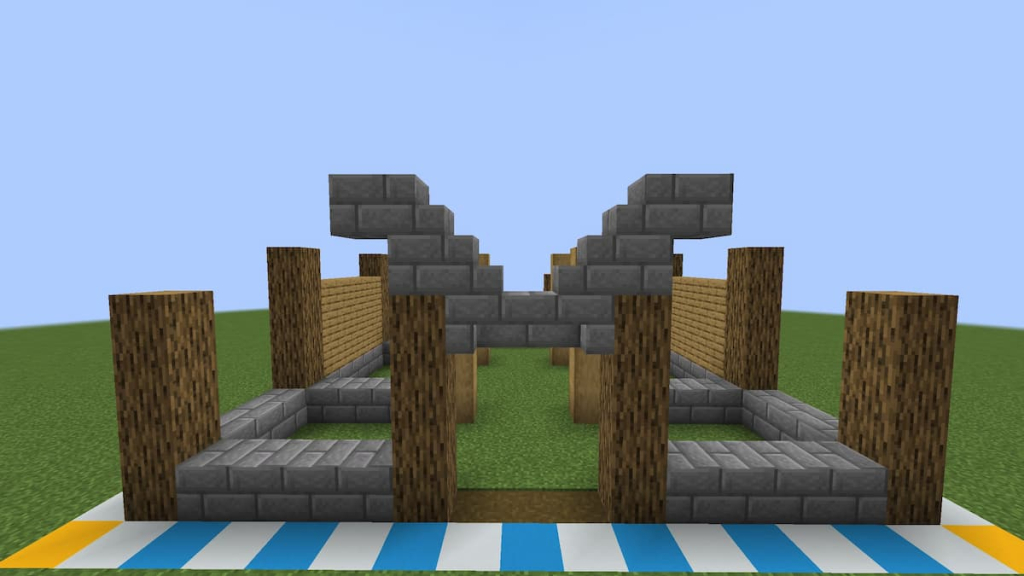
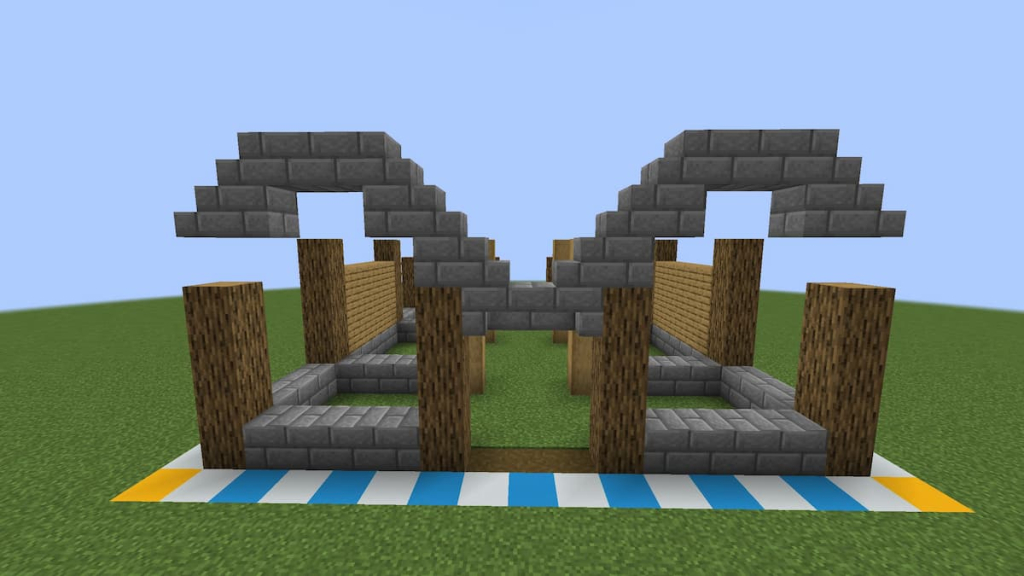
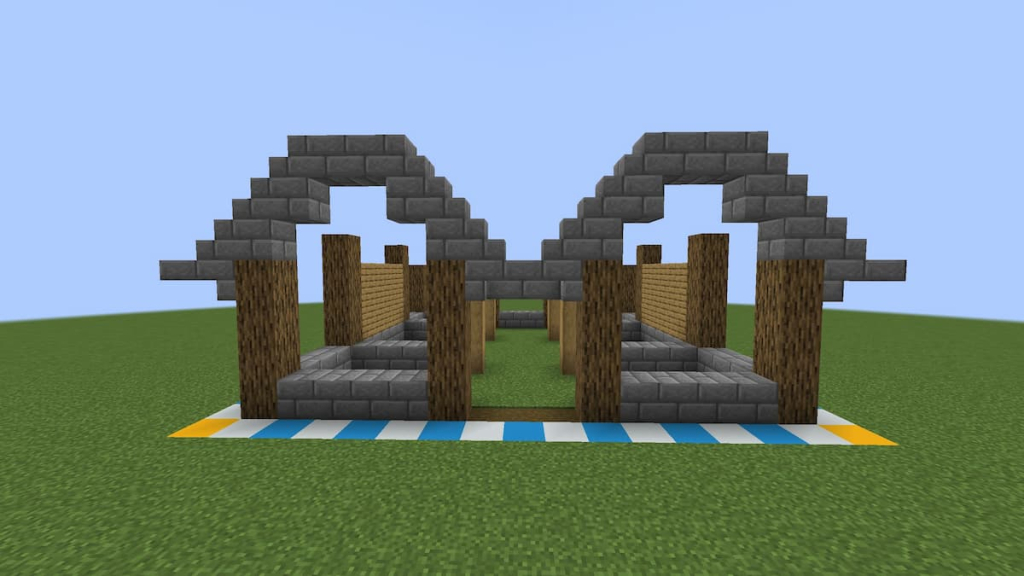
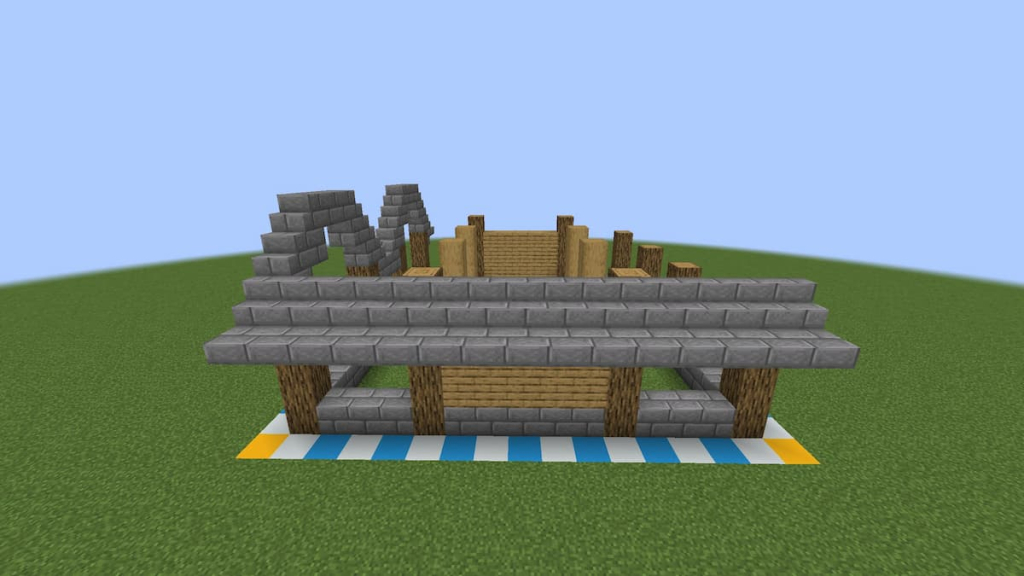
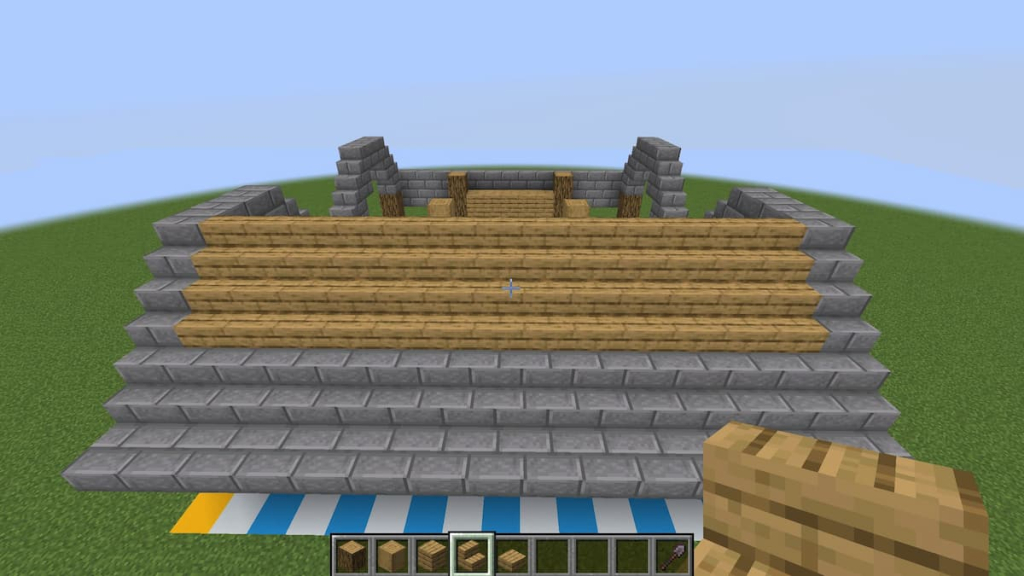
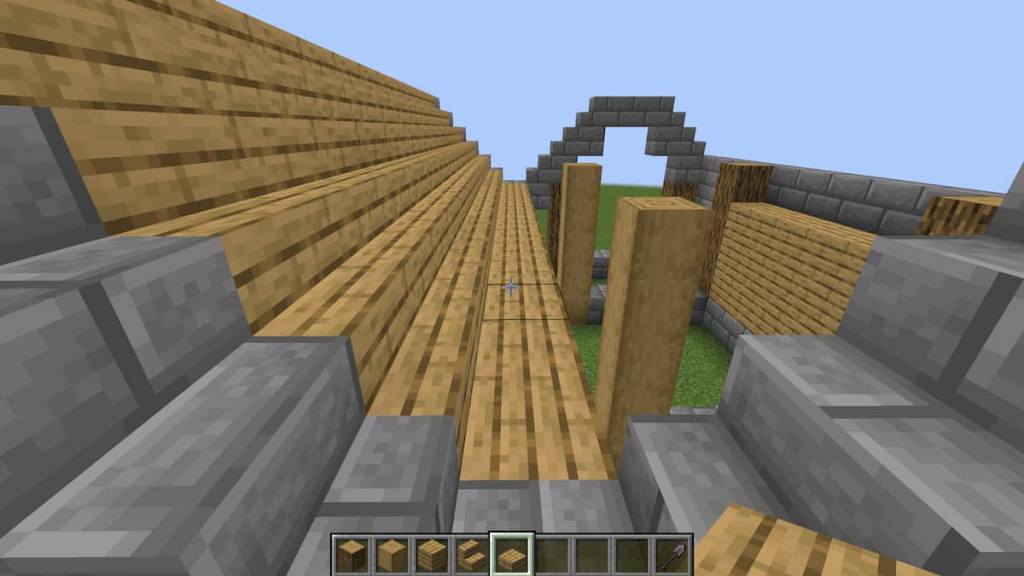
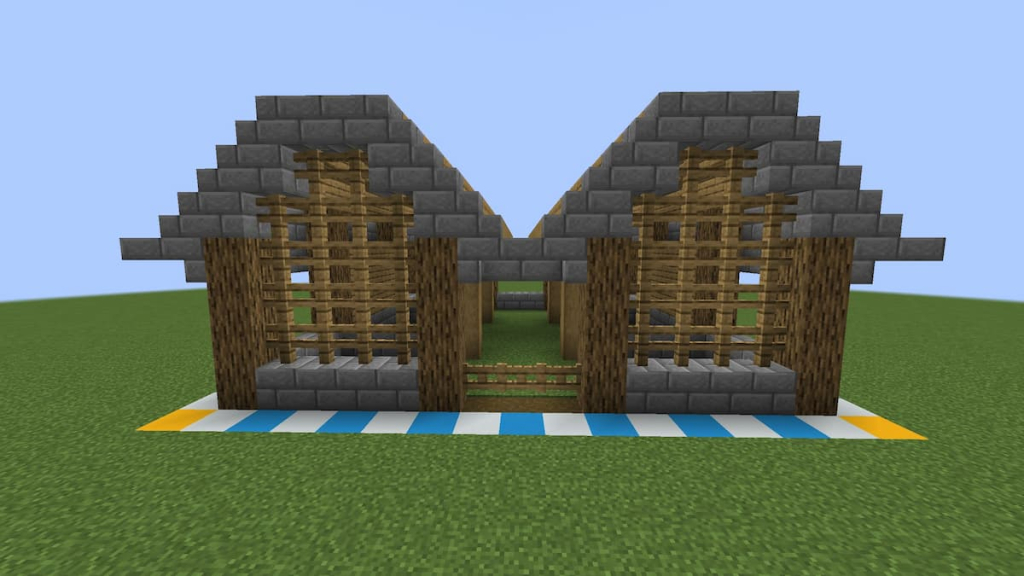
Repeat this on the opposite side, then copy the front side onto the back. The image below depicts the pillar placements, while the numbers represent the number of blocks between each oak log.
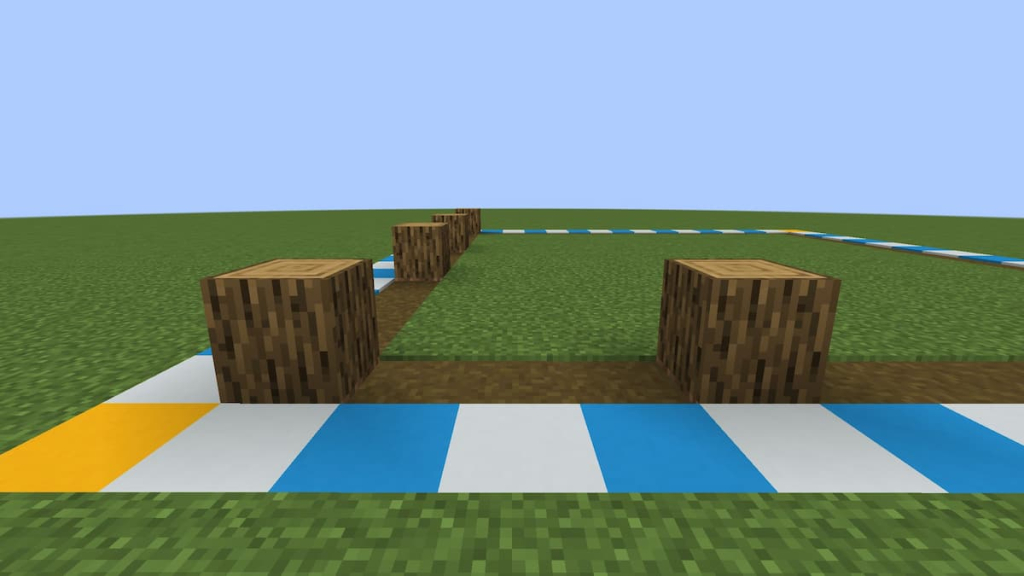
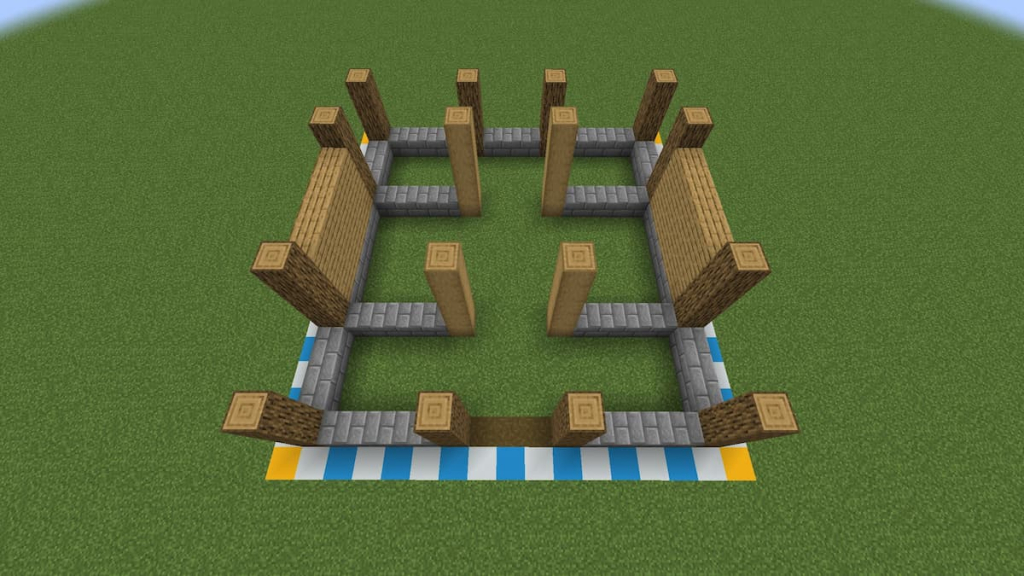
After placing all of the oak logs, make all of the logs on the front and back of the horse stable four blocks tall.

Then make the remaining four logs in the center of the left and right sides 5 blocks tall. These taller pillars are marked with stars in the diagram below.
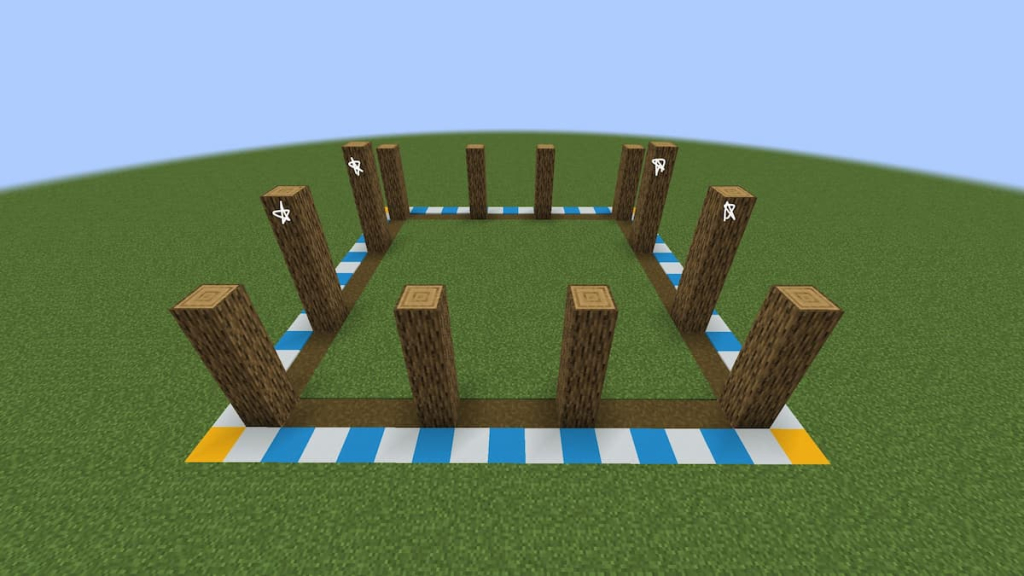
Now add a single layer of stone bricks between each of the pillars, making sure to leave the center of the front empty for the entrance.

Head to the right side of the horse stable. Fill the 5-block area in the center with a layer of oak planks that is three blocks high. The oak planks should be one block lower than the logs in this area, but the same height as the log pillars everywhere else.
Repeat this on the other side.
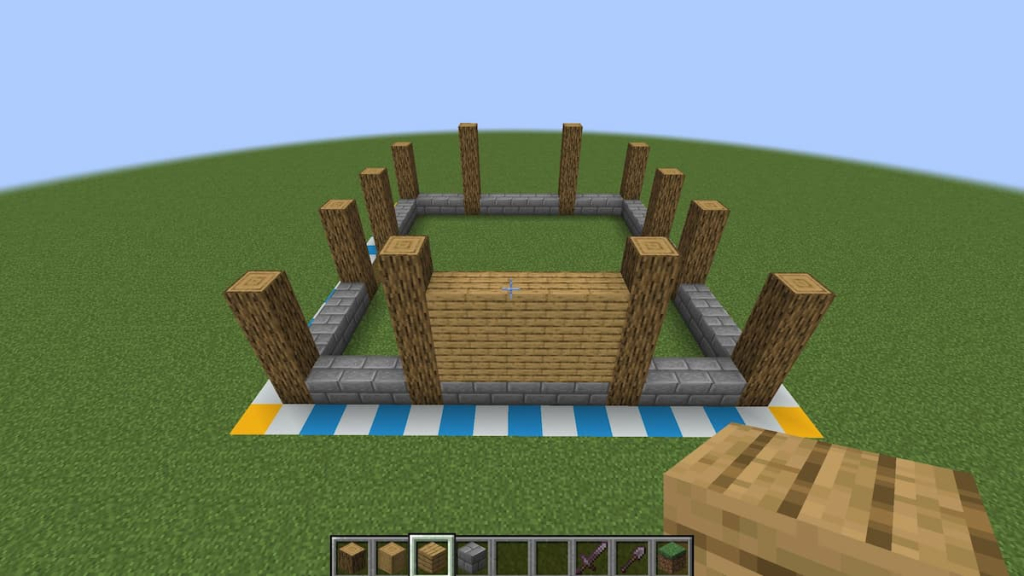
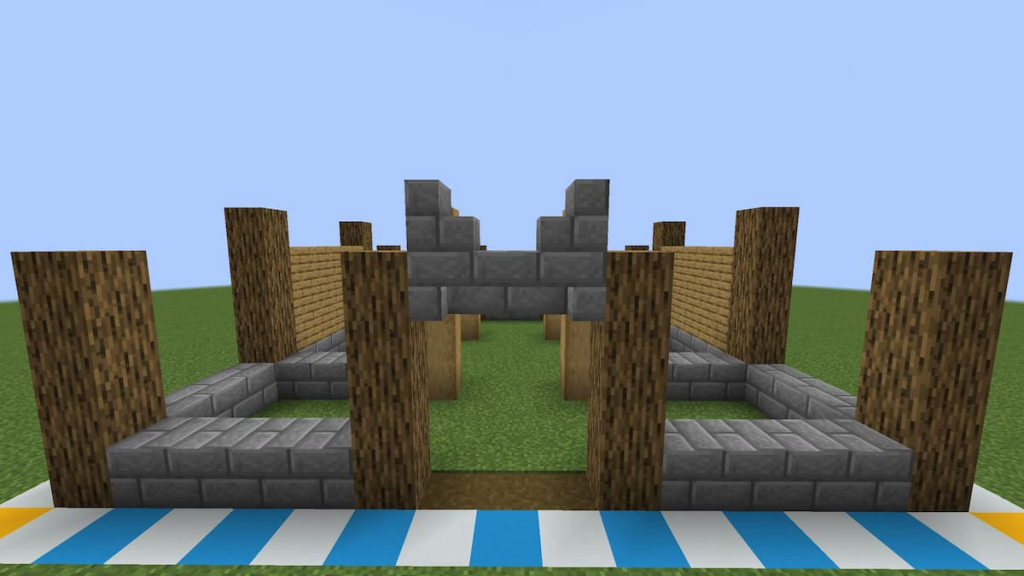
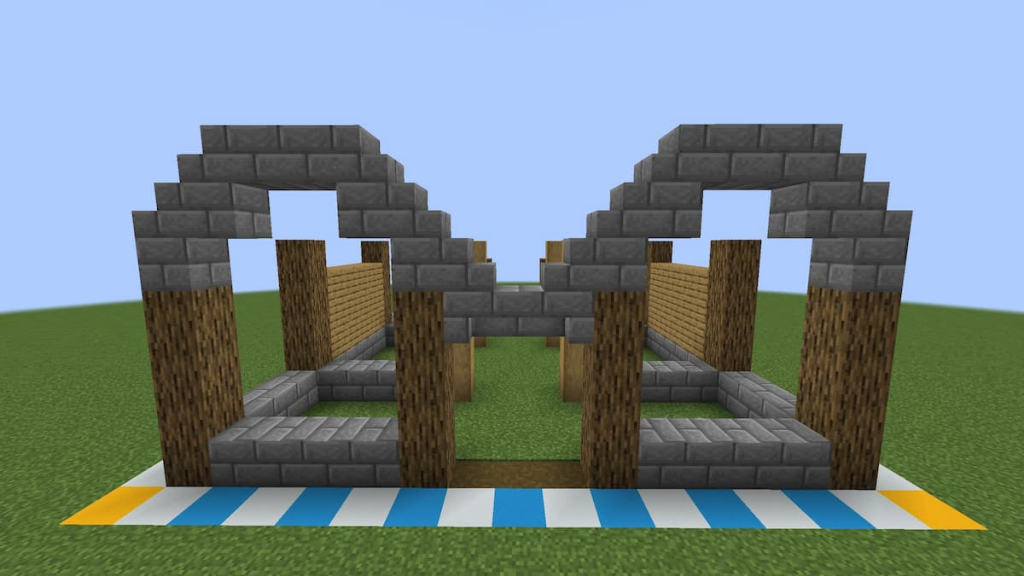
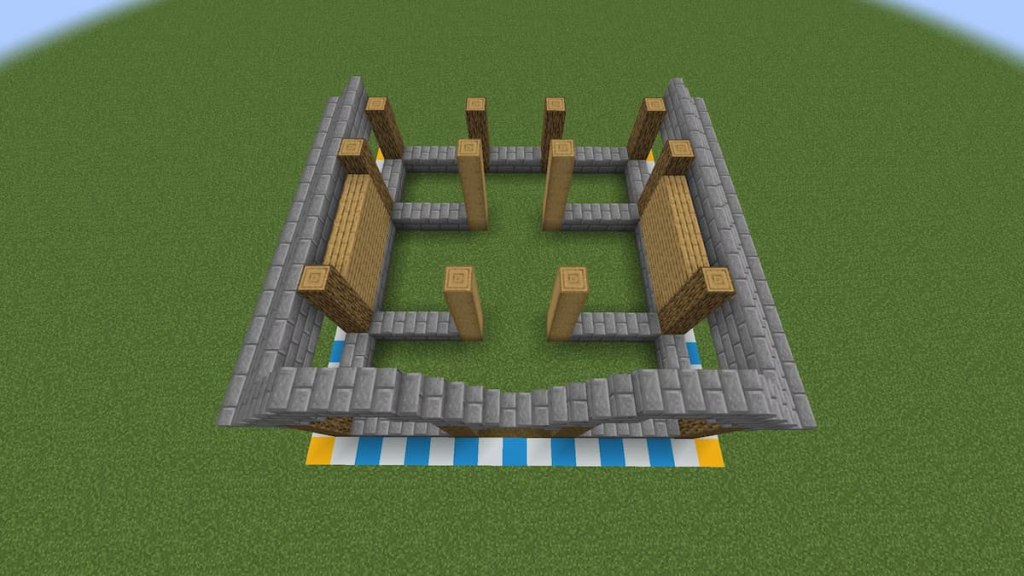
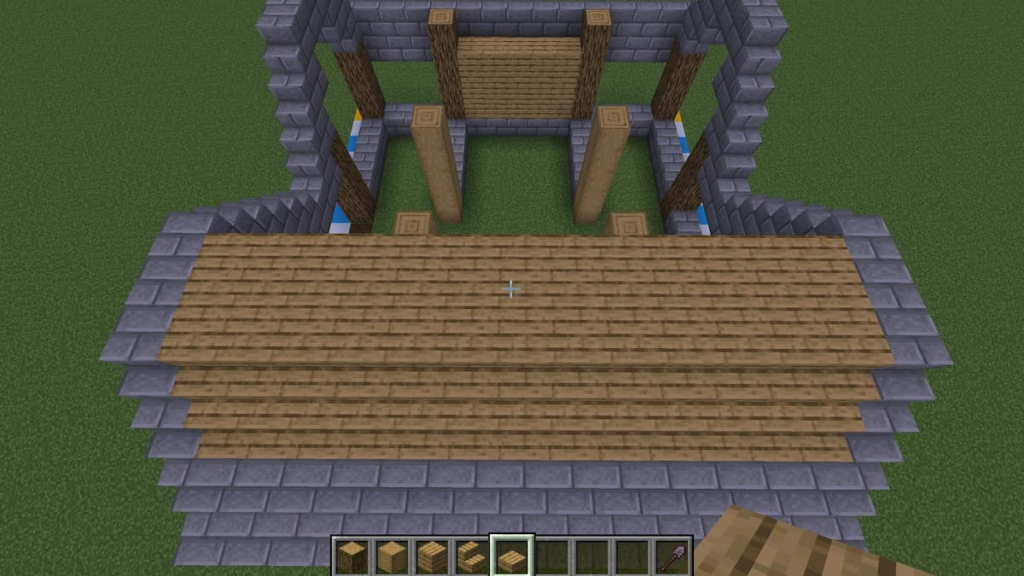
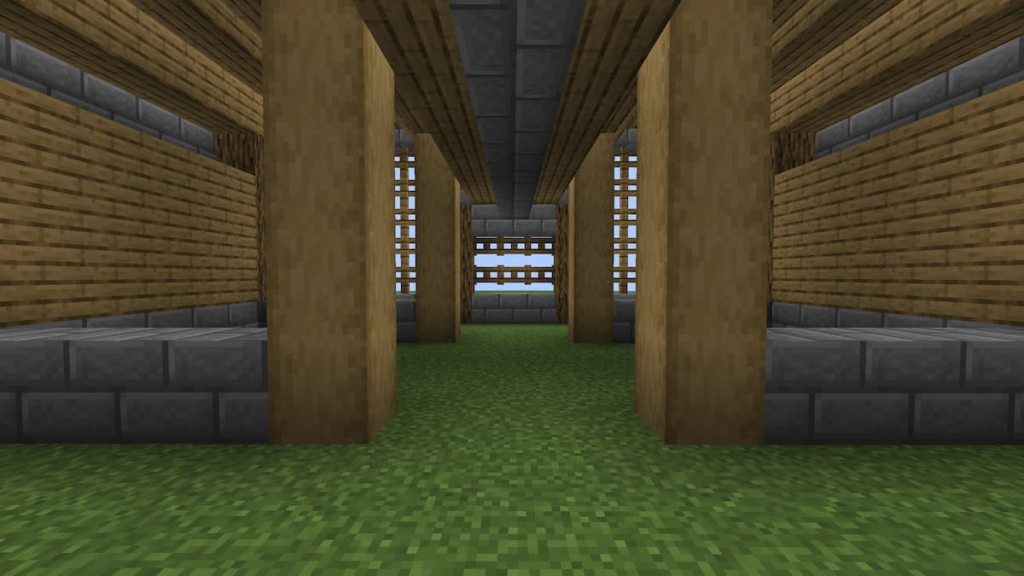
Before moving onto the roof, the stripped oak pillars that help divide the interior need to be placed. There are four in total, and each aligns directly with the nearest pillar on the side and front and back walls.
These pillars will be raised five blocks high.

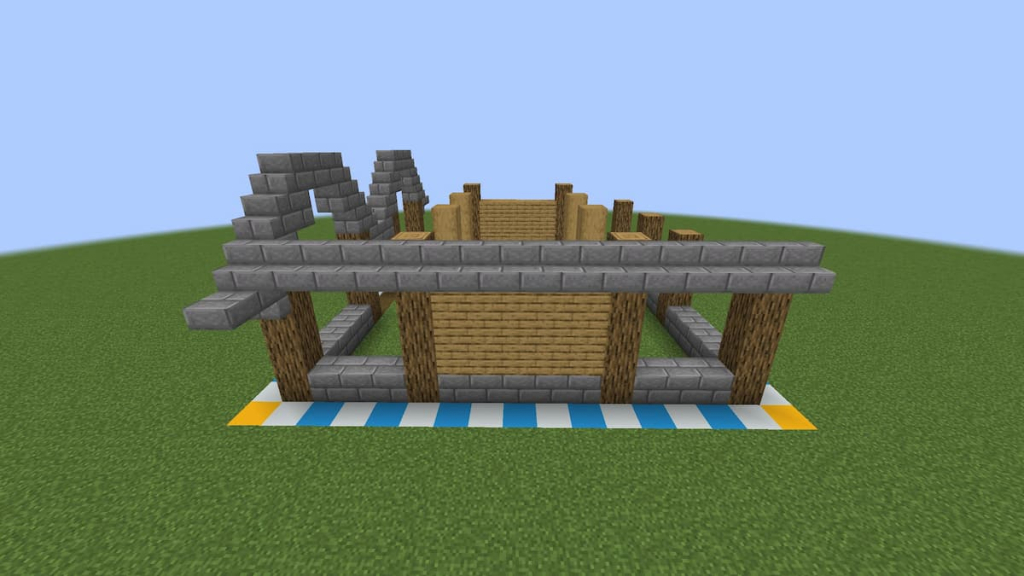
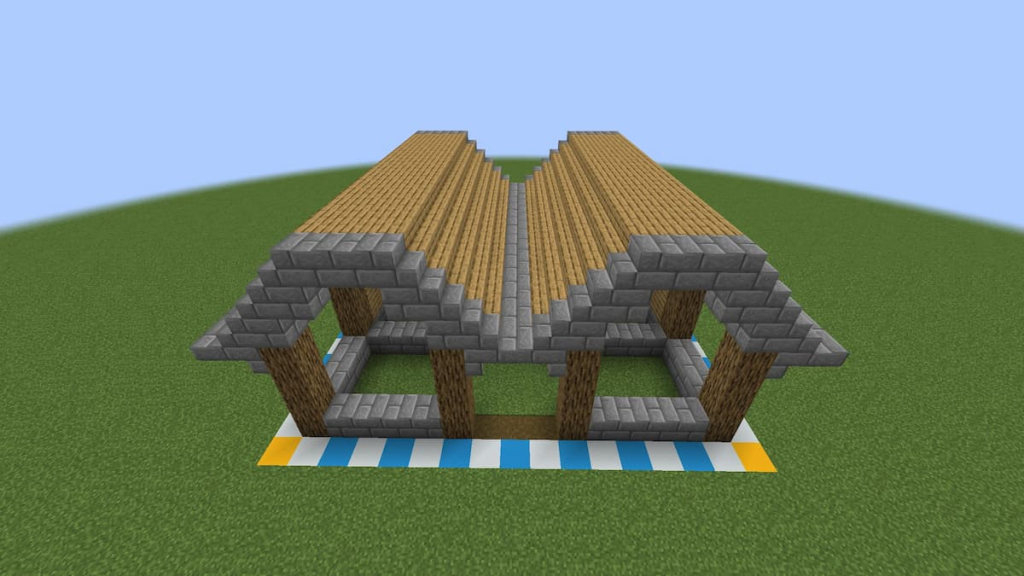
Connect each of these stripped oak pillars to the oak pillars on the sides using three stone brick blocks. The result will look like this.
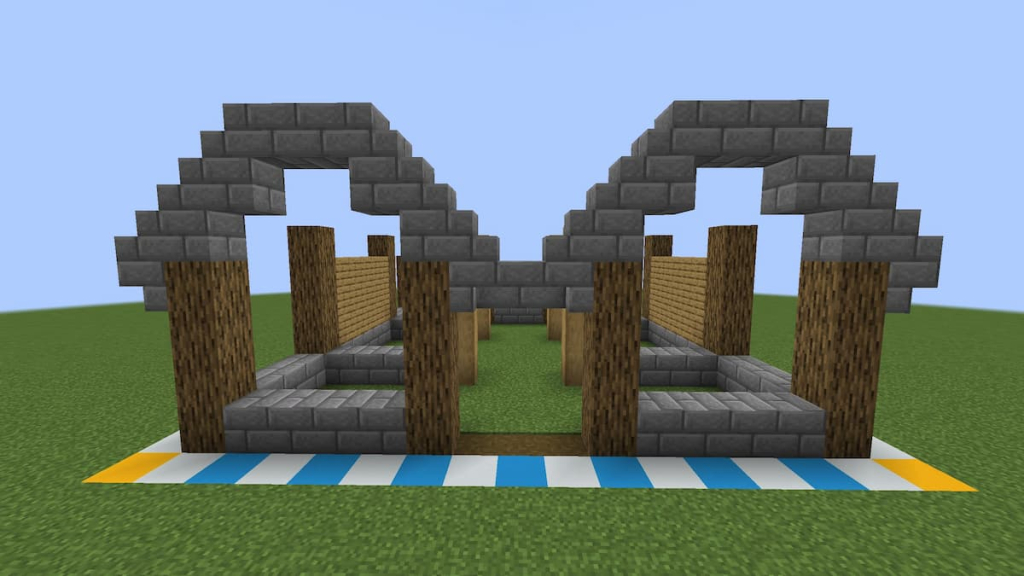
From here, we’ll jump into building the roof as it will make completing the walls easier.
Building the Stable’s Roof
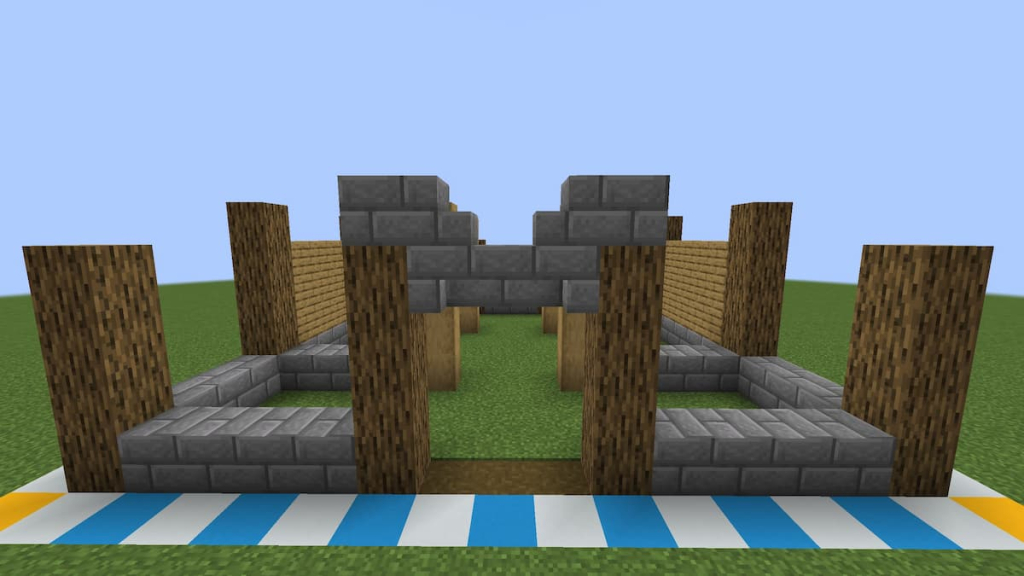
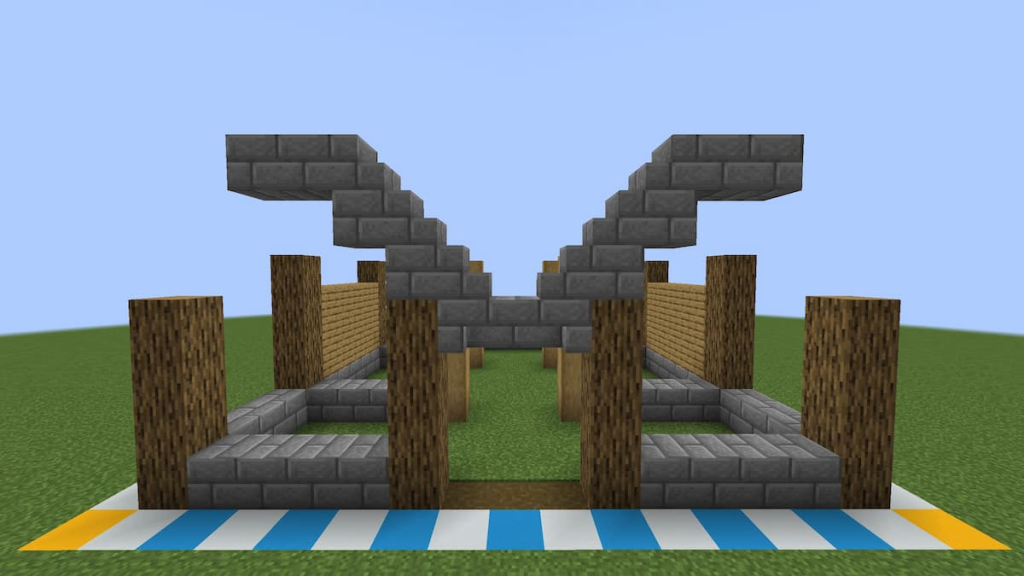
The roof is an M-shaped roof inspired by this image from Imgur. We’ll start by creating a stone brick outline, then fill in the rest of the roof with oak materials. At the horse stable’s entrance, place upside-down stone brick stairs against each oak pillar.
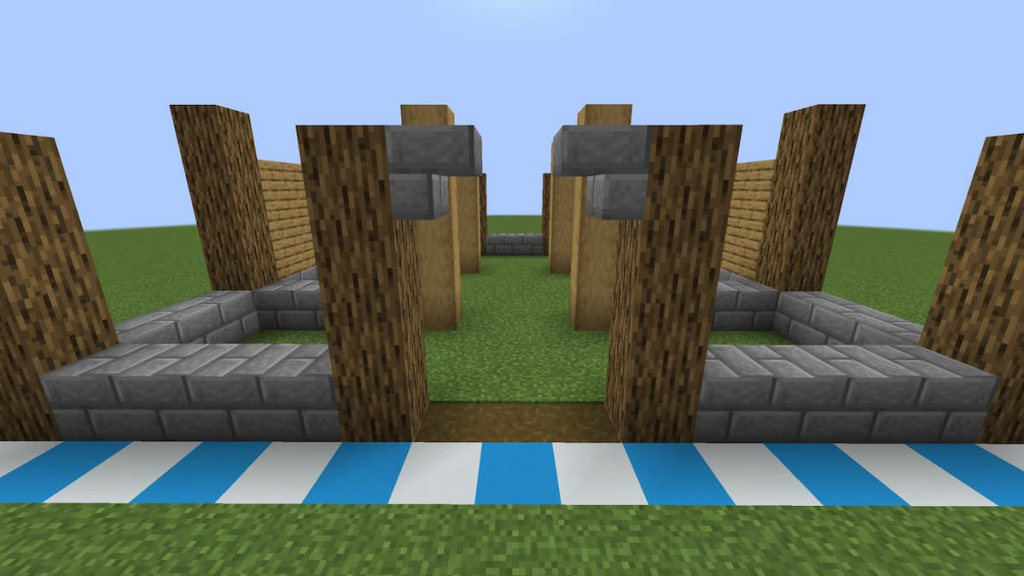
Place an upside-down stair between the two stone brick stairs.
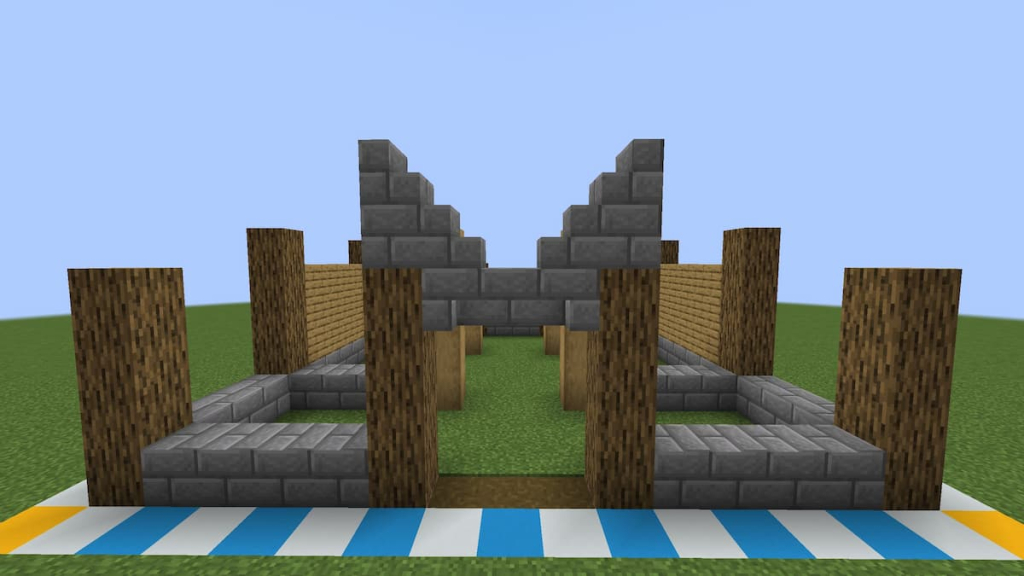
Add stone brick stairs on top of the upside-down stairs on the left and right.
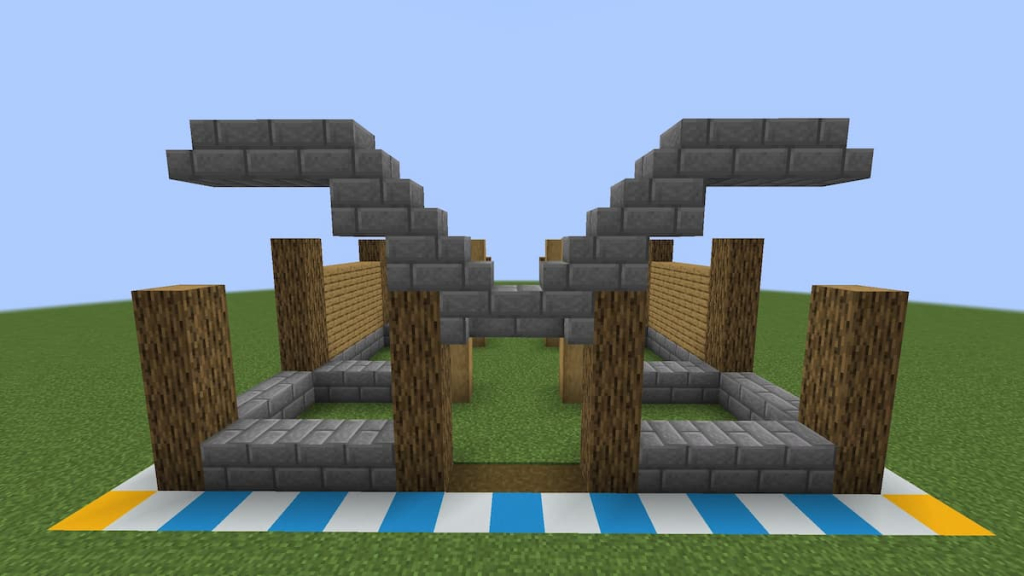
Place a stone brick block behind the stairs on top of the oak pillar.
Place stone brick stairs on top of the stone brick blocks.
Place another stone brick block behind the new stairs.
Continue the pattern by adding stone brick stairs on top of the block.

Place two stone brick blocks behind the newest staircase.
Start angling the roof back down by placing stone brick stairs against the second block.
Place a stone brick block beneath the stairs.
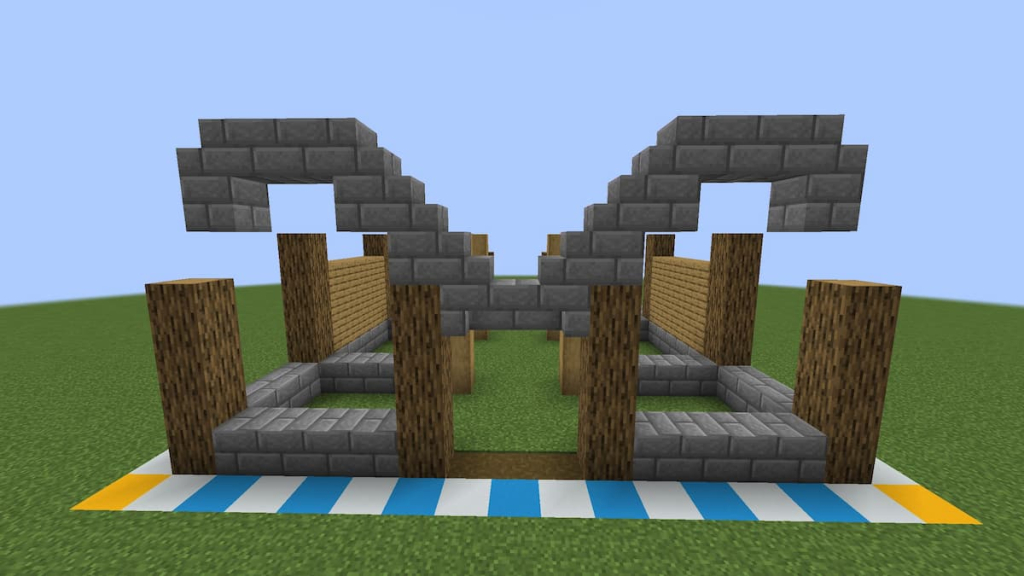
Place stone brick stairs against the block.
Add the stone brick block beneath the stairs, which should be on top of the corner pillar.
Add stone brick stairs against the block.
Place upside-down stone brick stairs beneath the stairs.
Finish the front by adding a slab at the top edge of the upside-down stairs.
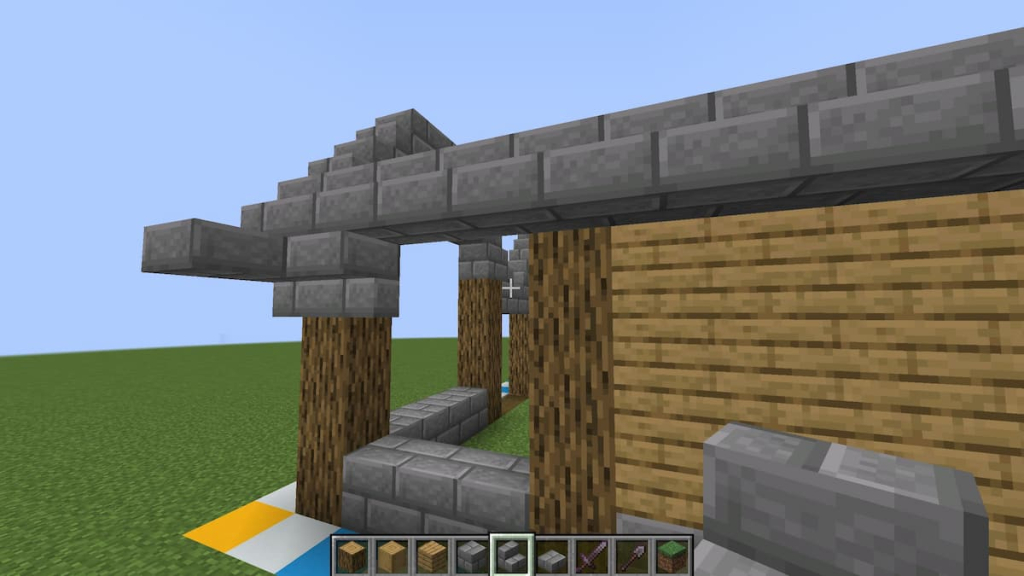
To build the side, place a line of stone brick stairs extending from the lowest upright stairs to the oak pillar at the back corner.
Continue the roof by placing a row of upside-down stairs beneath this row.
It should look something like this.
Finish of this side of the roof’s frame by extending a row of slabs to that corner oak pillar.
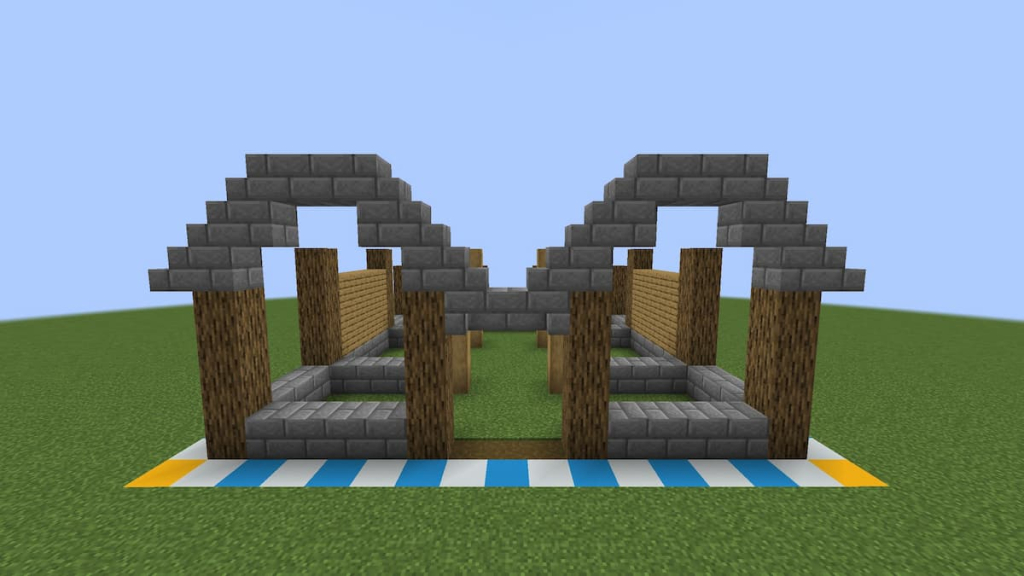
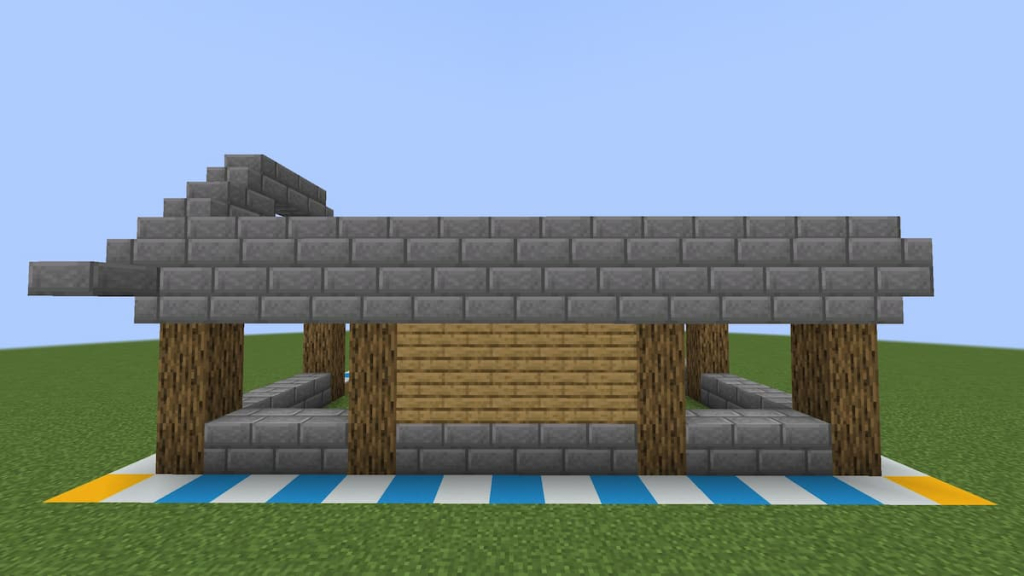
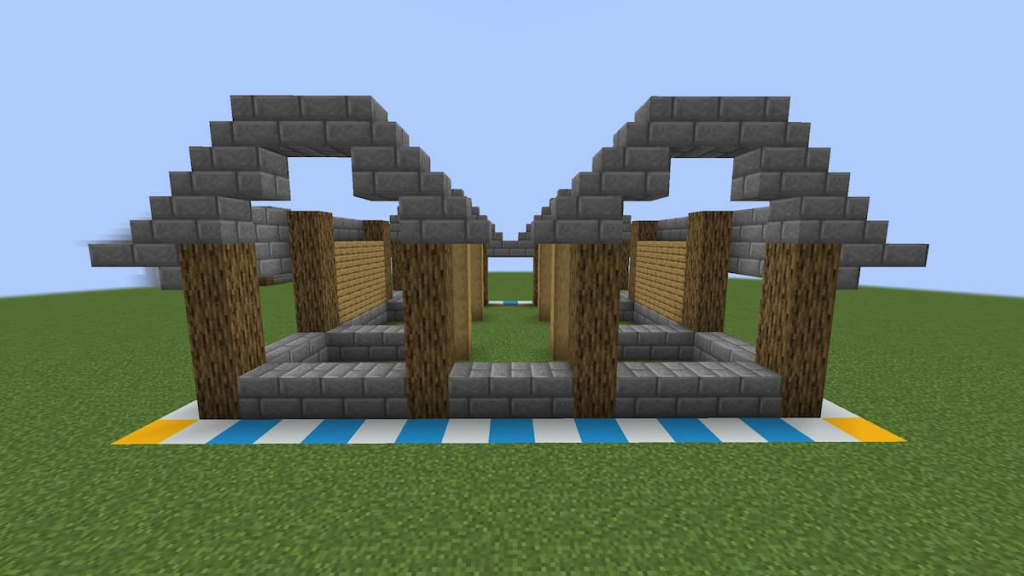
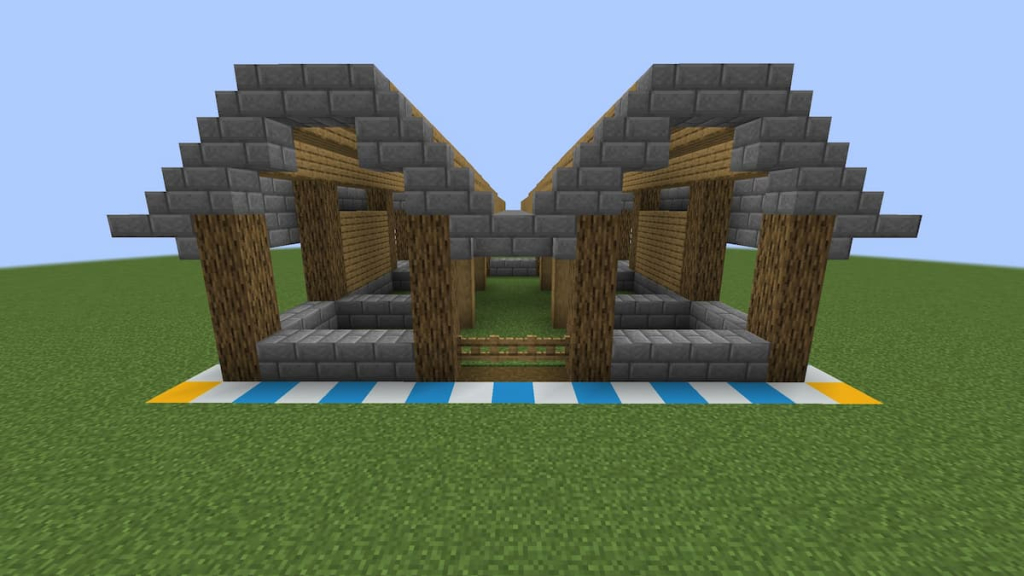
Duplicate this on the other side. From the top, the roof should look like this.
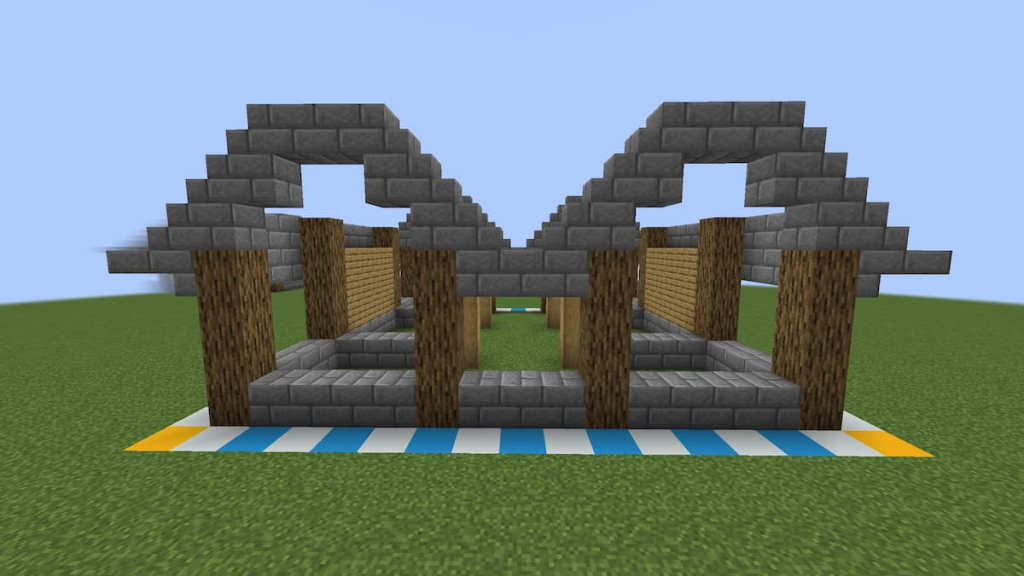
To do the backside, copy the front of the roof while leaving the space beneath the center stairs empty.
Fill that space with a row of three stone brick blocks to close off the end. If you want to add a second entrance, you can mimic the front exactly instead.
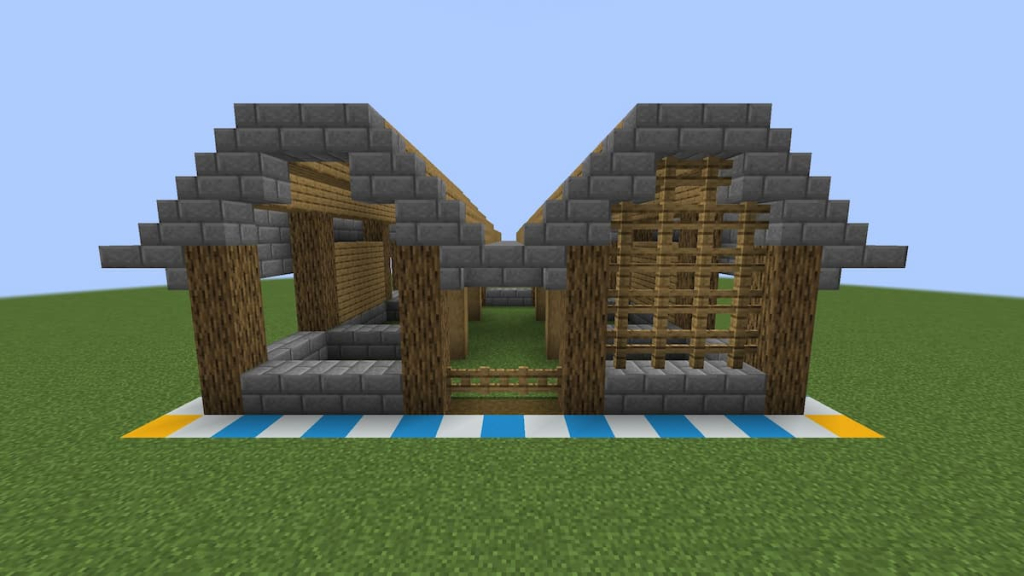
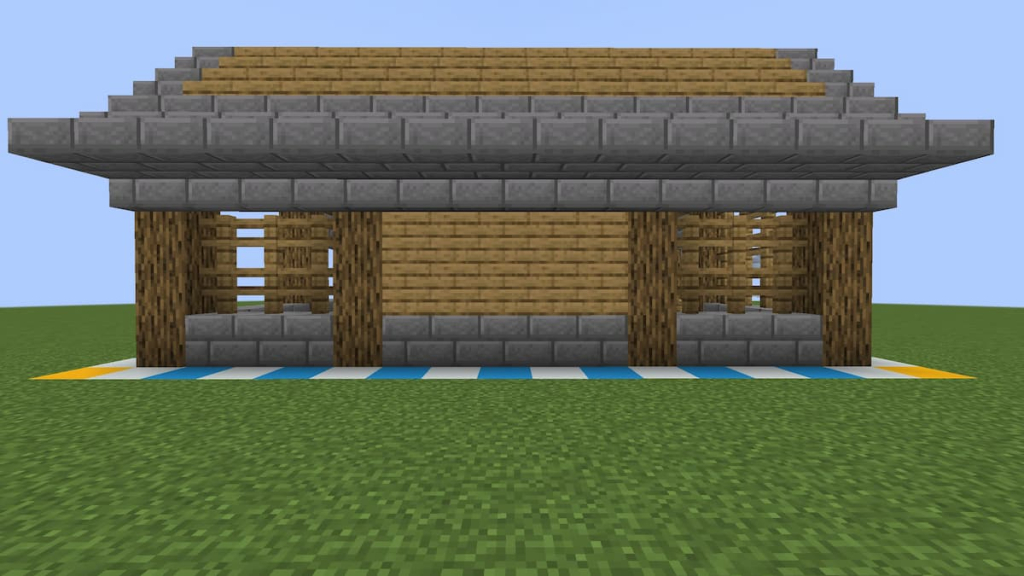
Now that the frame is done, the roof just needs to be filled in! Work from the outside towards the center, starting by placing two rows of oak stairs.
Cover the peak of the roof with oak slabs to add a bit of height to the ceiling inside.
After the slabs, fill in two more rows of oak stairs. These should lay on top of the stripped oak pillars inside of the horse stable.
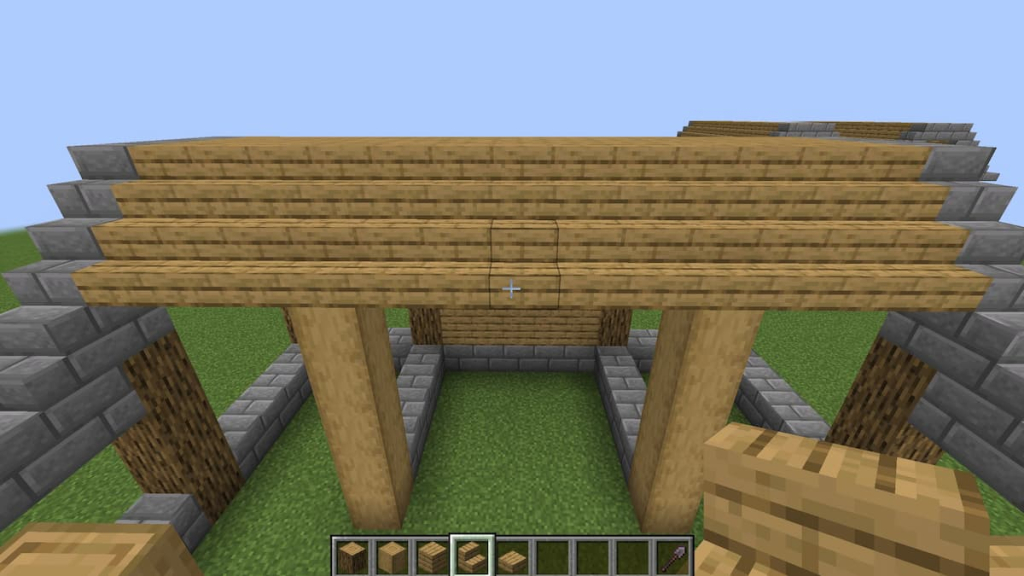
Add one more row of oak stairs.
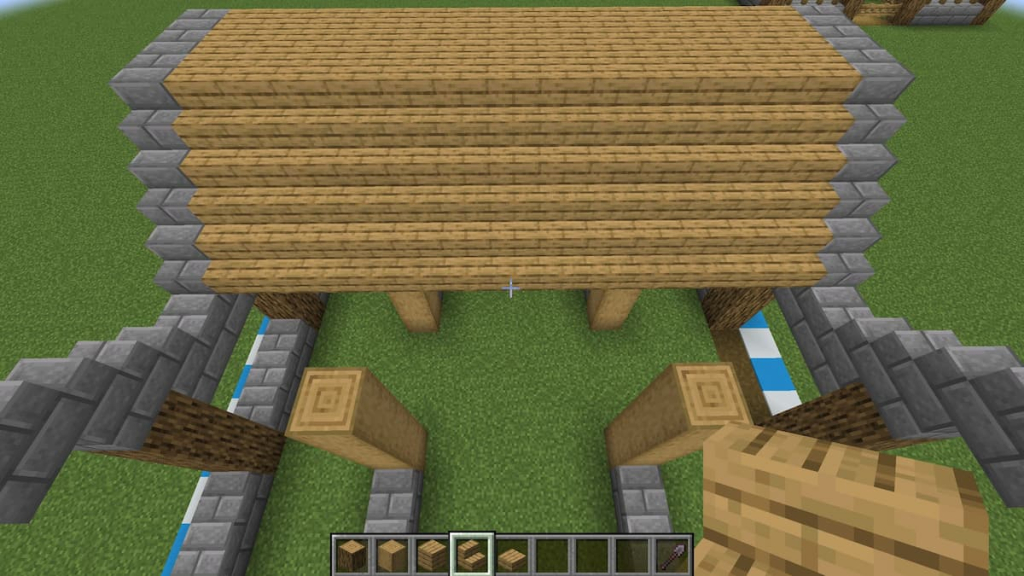
Complete the center by adding a row of oak slabs down the middle.
Finish the other side of the roof in the same way, and you’re done!

For a little extra contrast, you can choose to substitute the oak slabs in the center for stone brick slabs.
Finishing the Exterior with Fences
Place three fence gates between the two center oak pillars. For extra protection, a second row of fence gates can be added above the first.
Fill in the wall on the right side with oak fences. This will allow you to see the horses freely while keeping them safe from danger. They can also be used to tie up horses inside or outside of the stable.
Duplicate the fences on the left side.
On the sides of the horse stable, add two rows of fences in each hole. There will be a gap between the top of the fences and the wall, but this will be fixed while working on the interior.
On the back, add fence walls identical to those on the front.
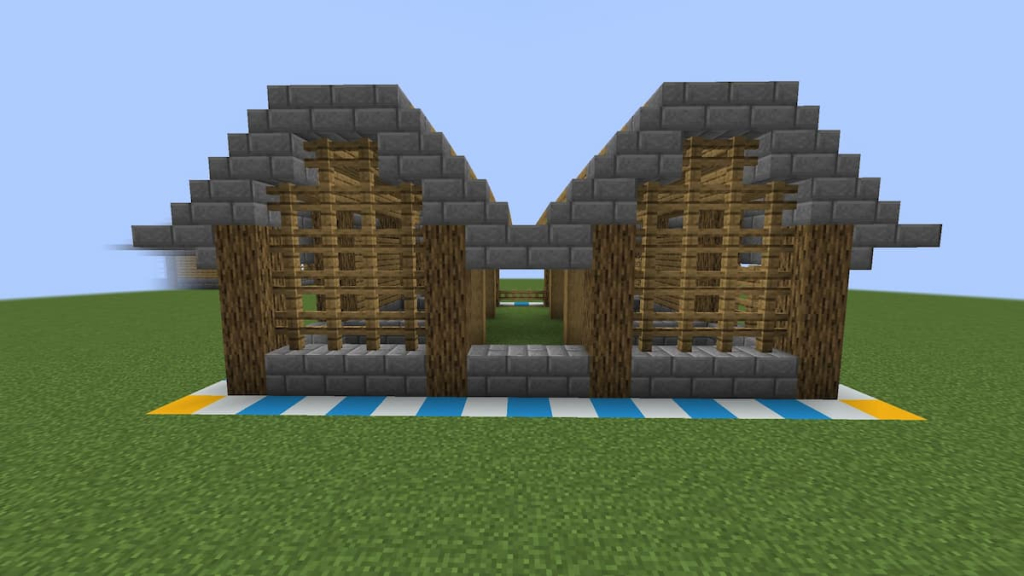
Finish off the exterior by adding two rows of fence gates in the center of the back. This will keep the horse stable protected and can be used as an exit in a pinch.
Building the Inside of the Stable
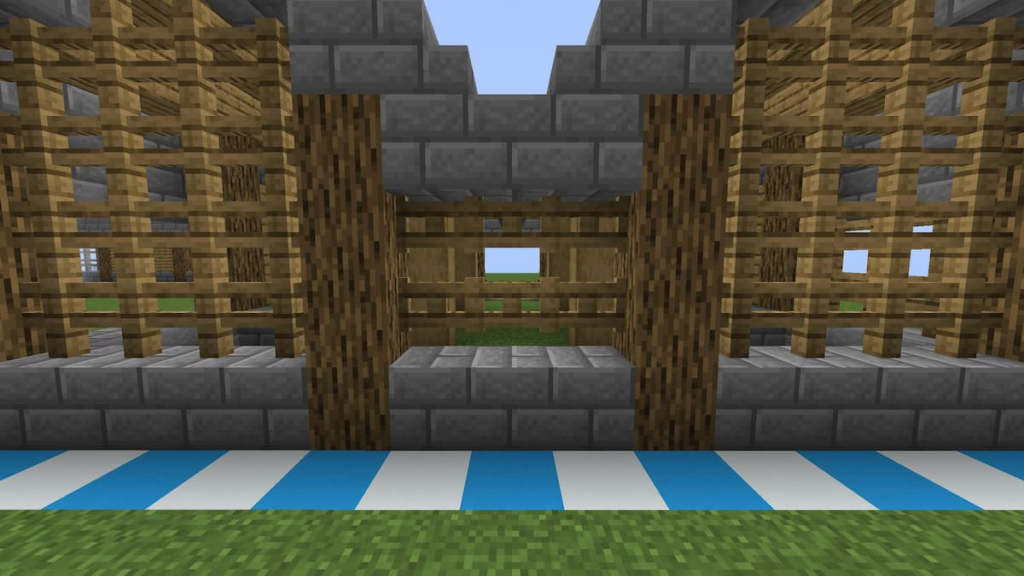
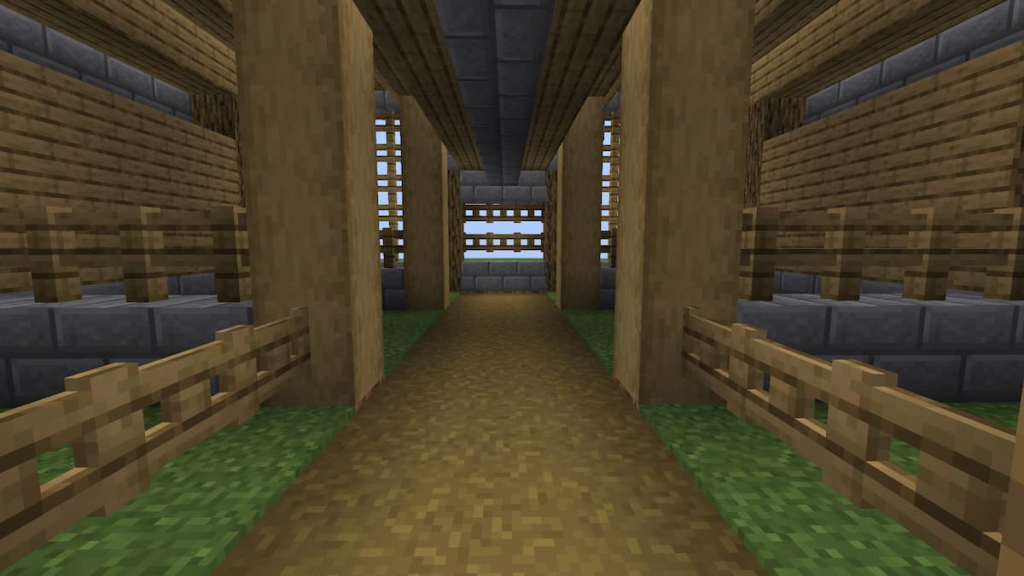
While the structure is finished, the inside of the horse stable feels bare.
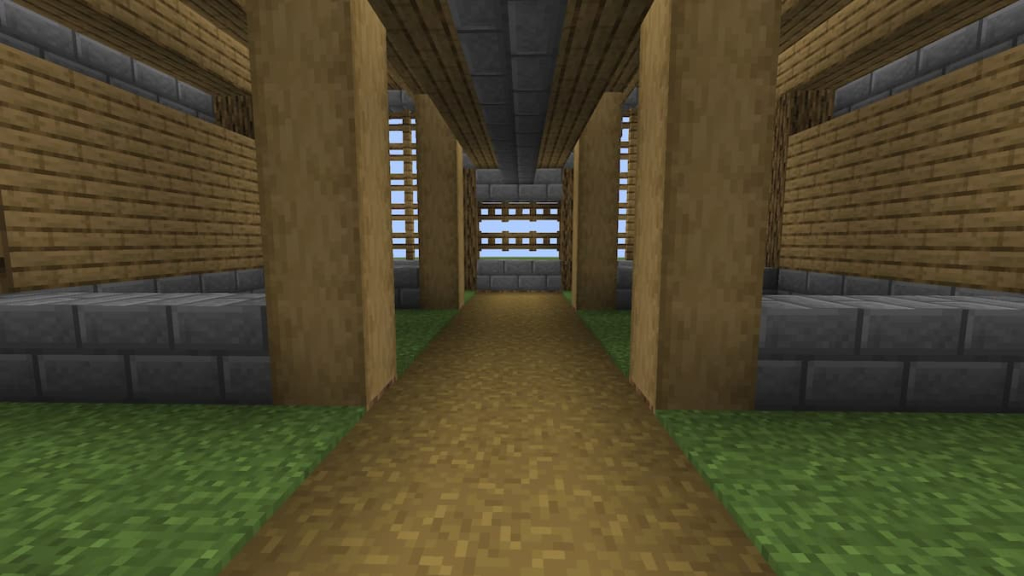
To spruce it up, use a shovel to create a three-block-wide path from the entrance to the back wall.
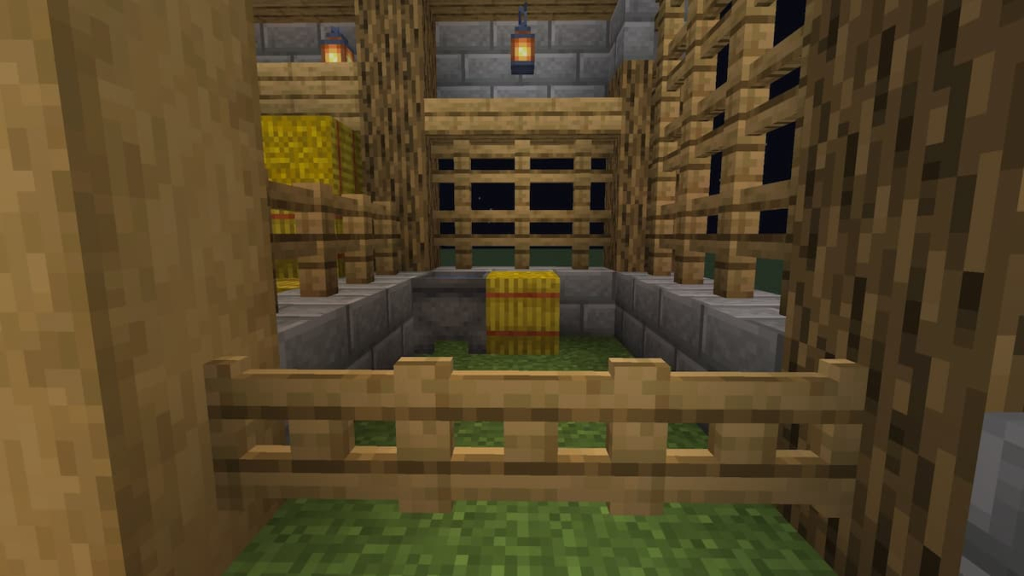
Then add a row of three fence gates between the first two pillars. This will divide the first two stalls from the path.
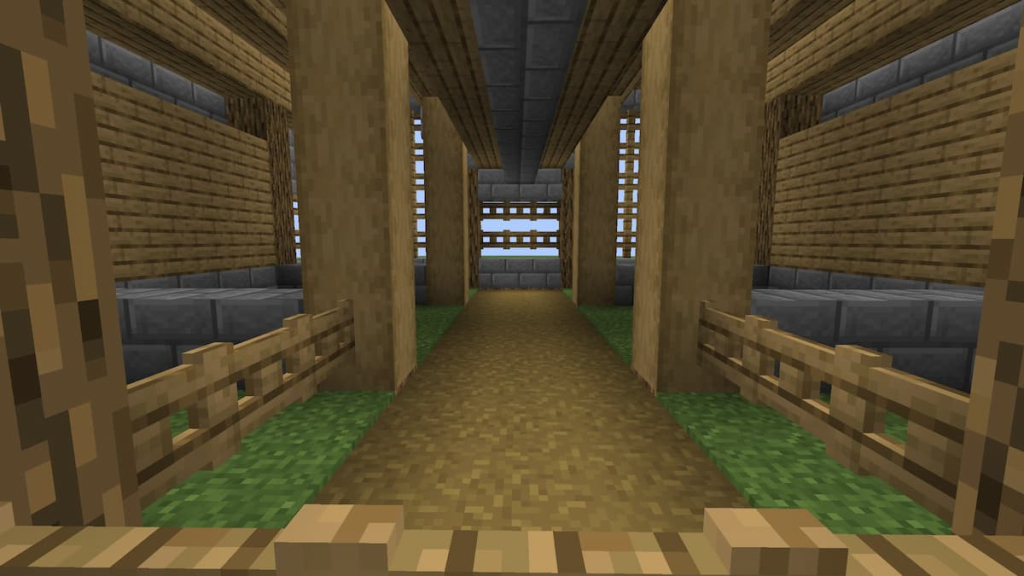
Do the same at the two stalls in the back.
From here, add a row of fences on top of the stone bricks on the side of each stall. These fences will prevent the horses from escaping.
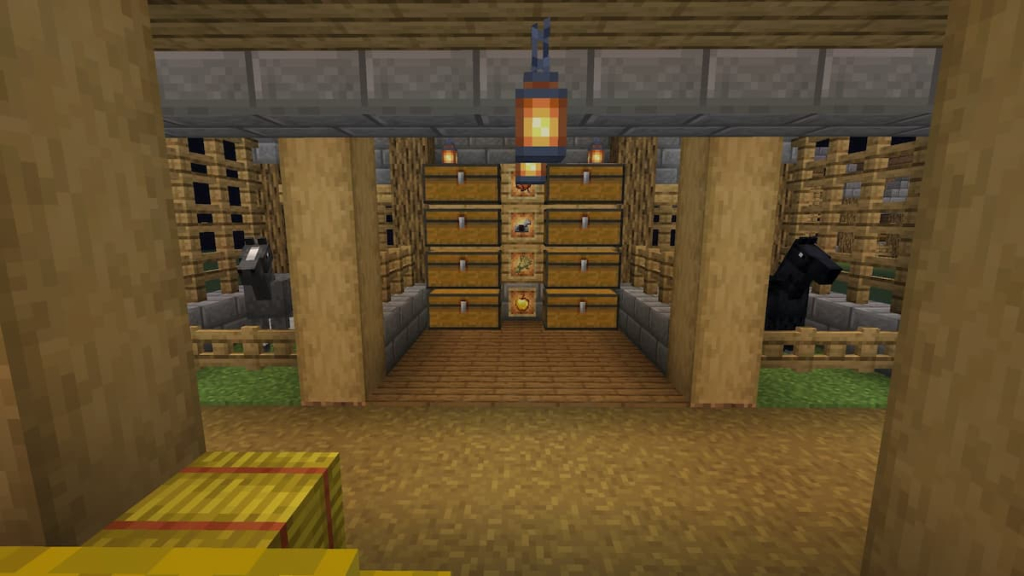
Next, add a light source! Here I used lanterns, placing the first set on the ceiling right next to the door, the second set six blocks away, and the last set right next to the back wall. There should be five blocks between the center lanterns and the front and back lanterns.
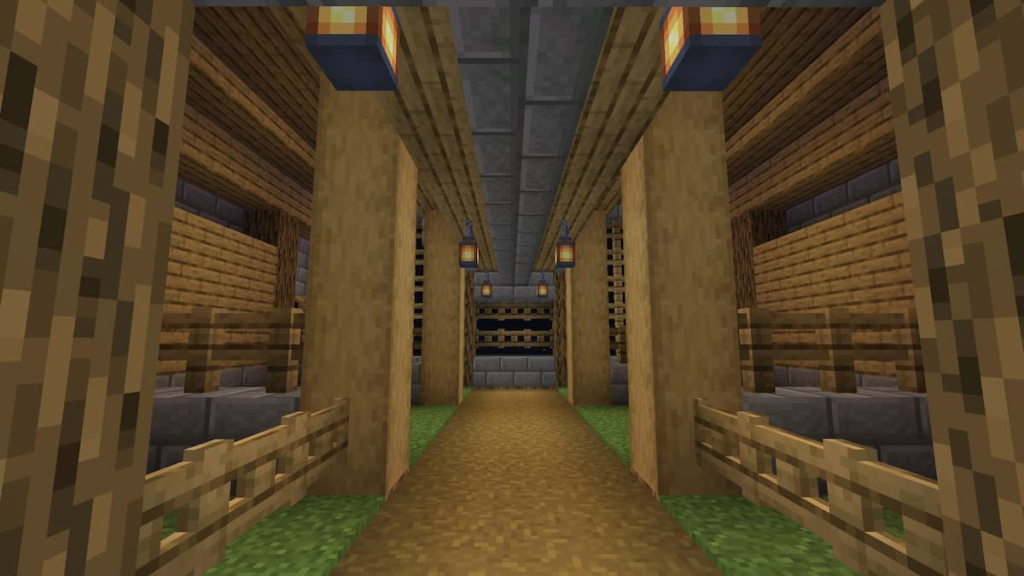
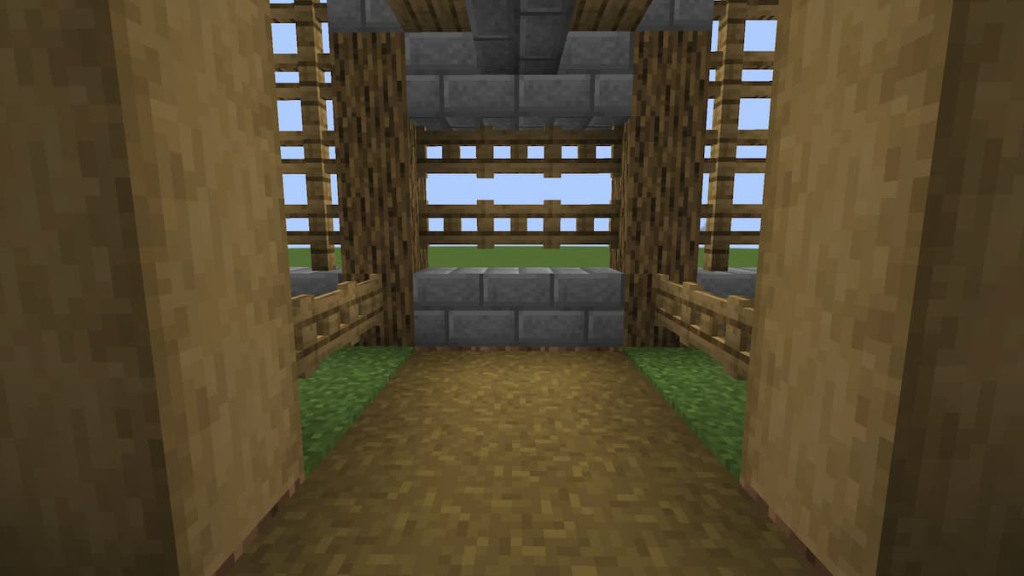
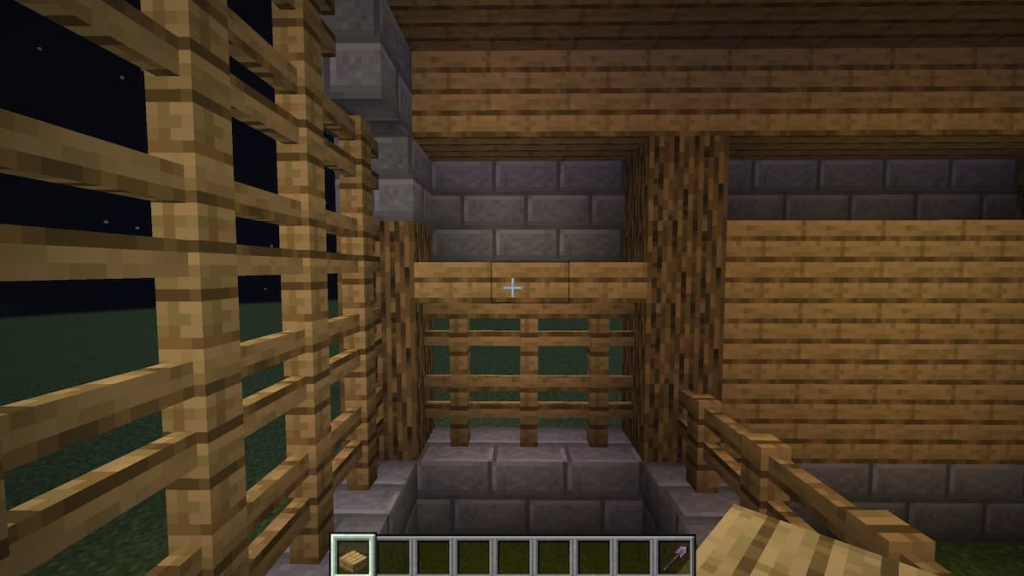
Now we’ll fix the small gap in the back of each stall by adding oak slabs on top of the fences. Do this for all four stalls.
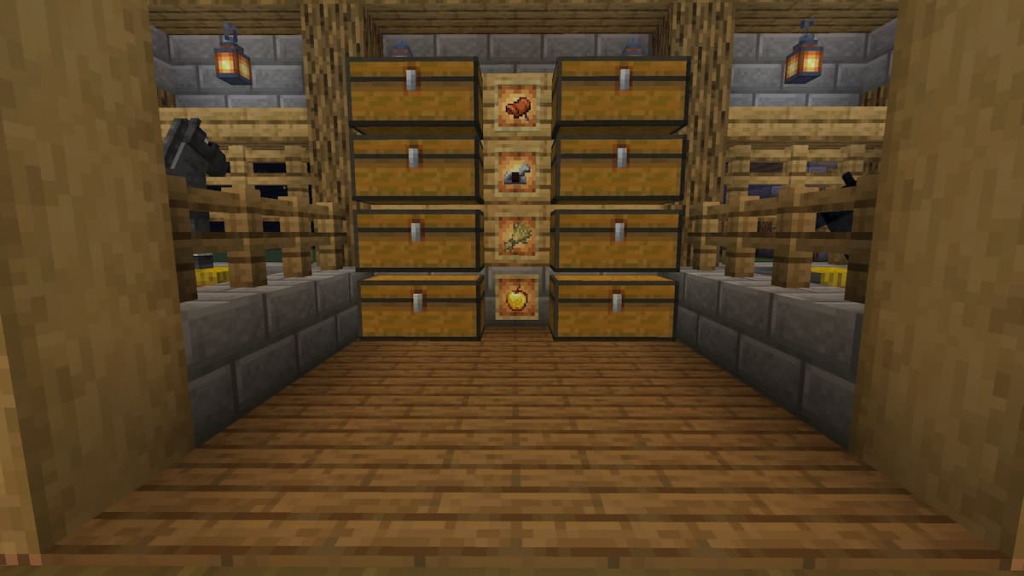
Choose either the left or right middle section to use as a storage room. Here I added a spruce plank flooring, eight double chests, and four glowing item frames. I also added two lanterns in the alcove above the chests.
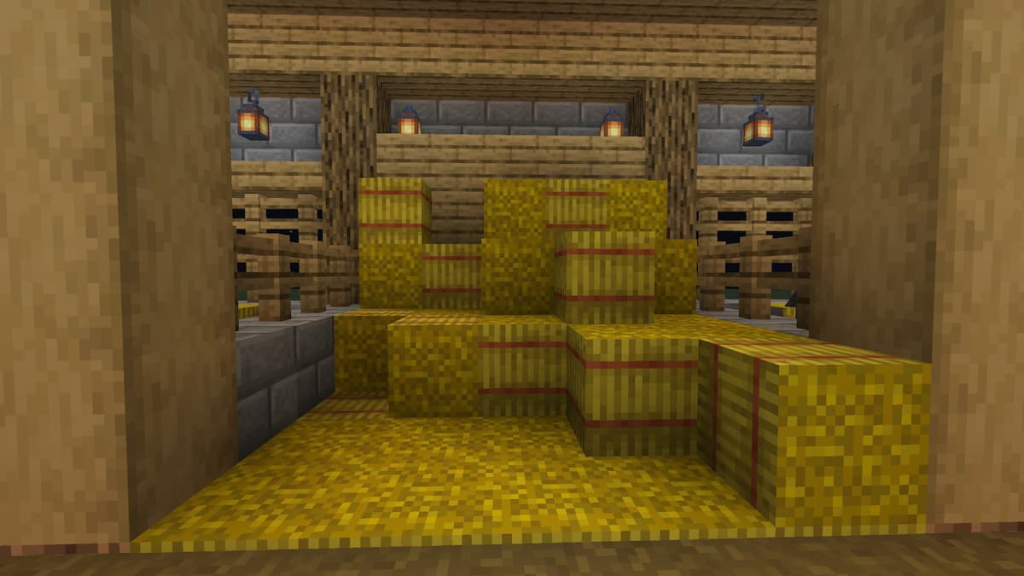
I filled the other center section with hay bales to make the stable appear more realistic.
Lastly, I added a cauldron with water and a bale of hay in each horse stall. Be careful about the placement, as high-jumping horses will potentially be able to escape by jumping off of these items.
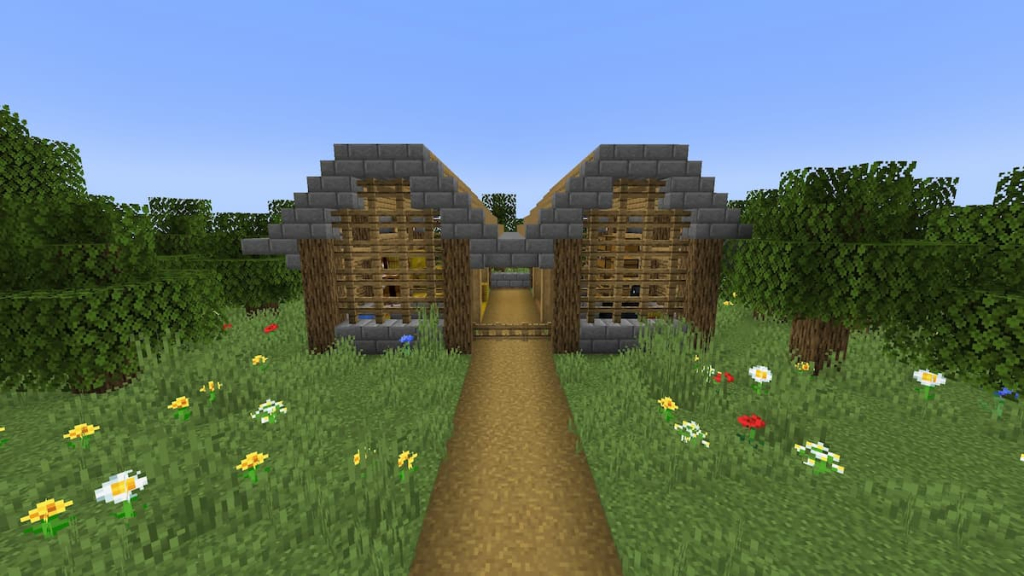
At the end, the stables will look something like this!