

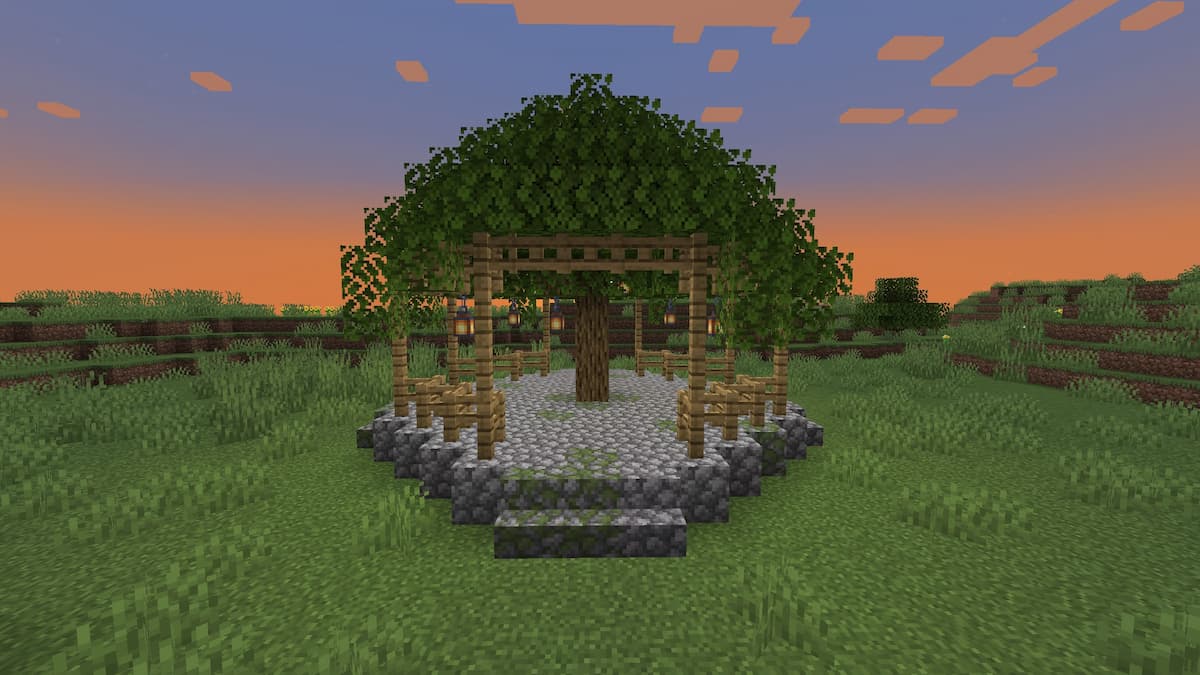
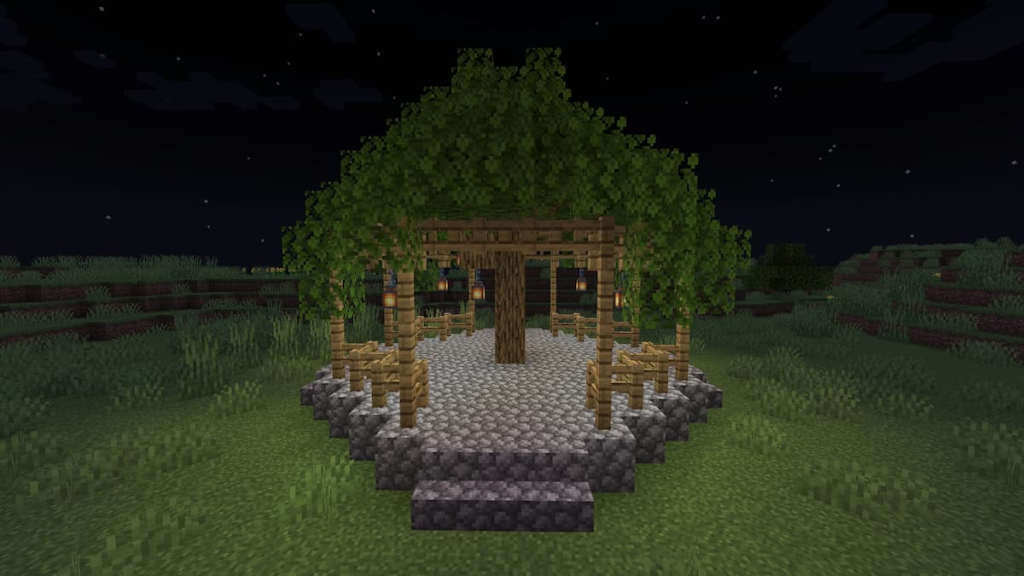
This oak gazebo is the perfect place to kick back and relax in your Minecraft world. It can be used as-is in the center of a village’s pathways, given benches to make a cozy sitting area, or placed near a small pond or lake to act as a covered fishing dock in combination with the oak version of our cottagecore bridge. Whatever you plan to use it for, this guide will teach you the ins and outs of building this gorgeous oak gazebo.
Table of Contents
Gazebo Material List
The materials for this build take inspiration from traditional Minecraft’s Plains Villages. They are very easy to find in-game and make the gazebo fit into any survival Minecraft world. If you prefer darker woods or a different type of stone, feel free to swap them out as you please.

The materials for this build are as follows:
- Cobblestone Blocks – 28
- Cobblestone Slabs – 69
- Cobblestone Stairs – 12
- Oak Fences – 72
- Oak Fence gate – 12
- Oak Wood – 11
- Oak Leaves – 175
- Lanterns – 7
How to Build an Oak Gazebo in Minecraft
While gazebos can look complicated, breaking them down into their basic components makes them easy to build! In this guide, I’ll walk you through the process of building the base, followed by the fence details, the center tree, and the oak leaf roof.
Building the Cobblestone Base
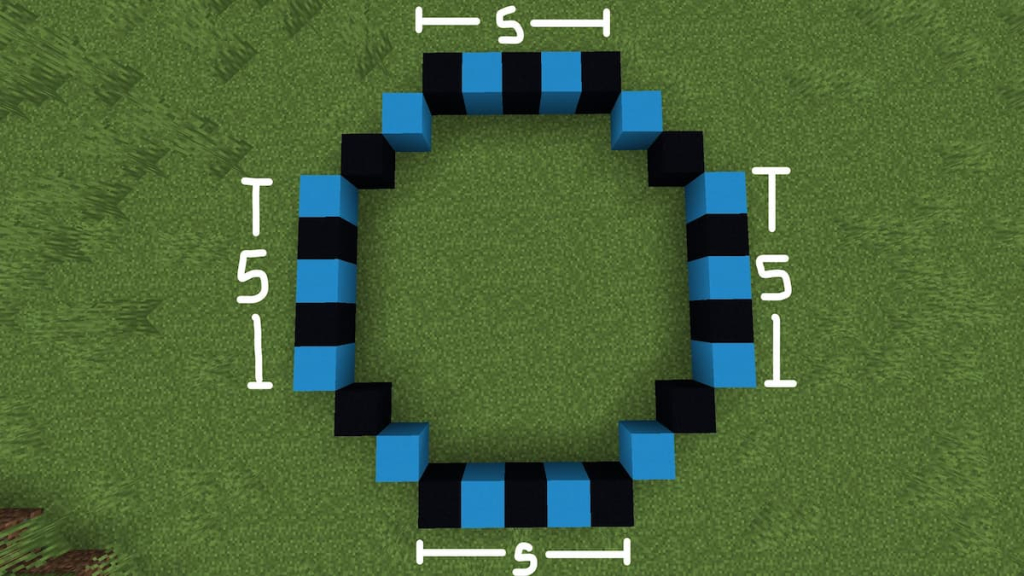
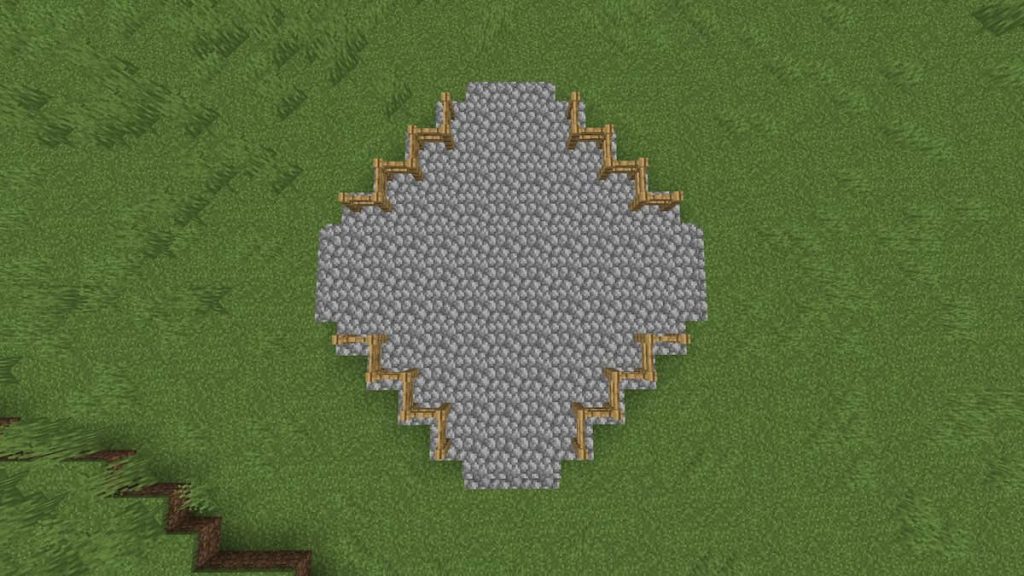
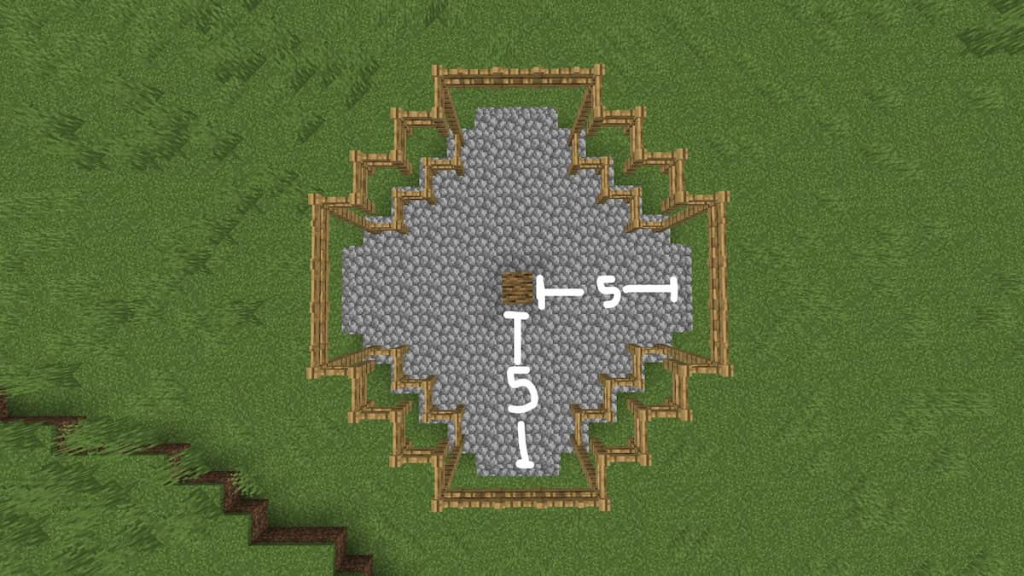
To start, you’ll need to build the base of the gazebo. I chose to build a circle 11 blocks in diameter using this Minecraft circle chart.
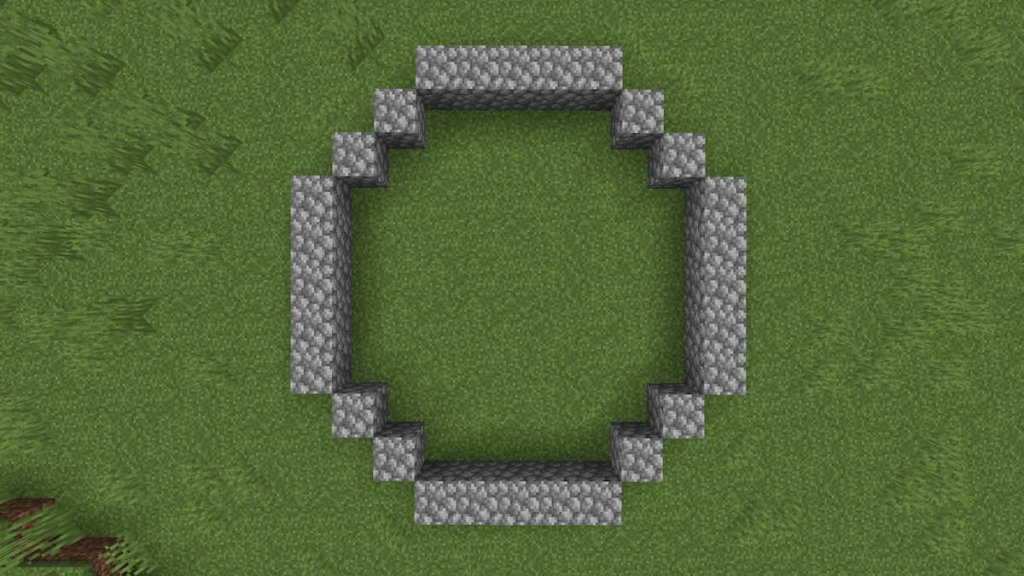
Use cobblestone blocks to build the circle’s border as depicted in the image above.
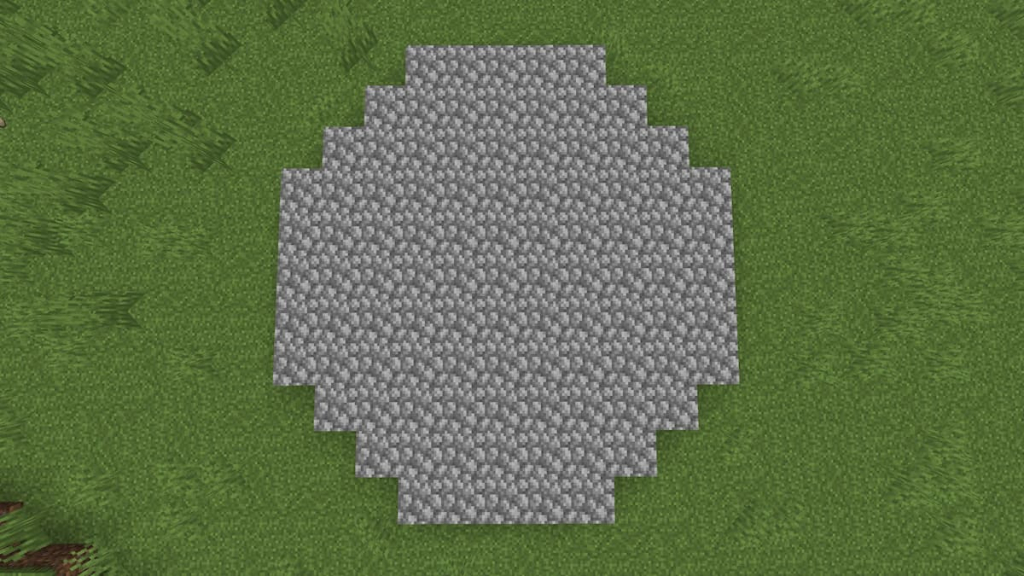
To save on materials, fill the circle in with cobblestone slabs.
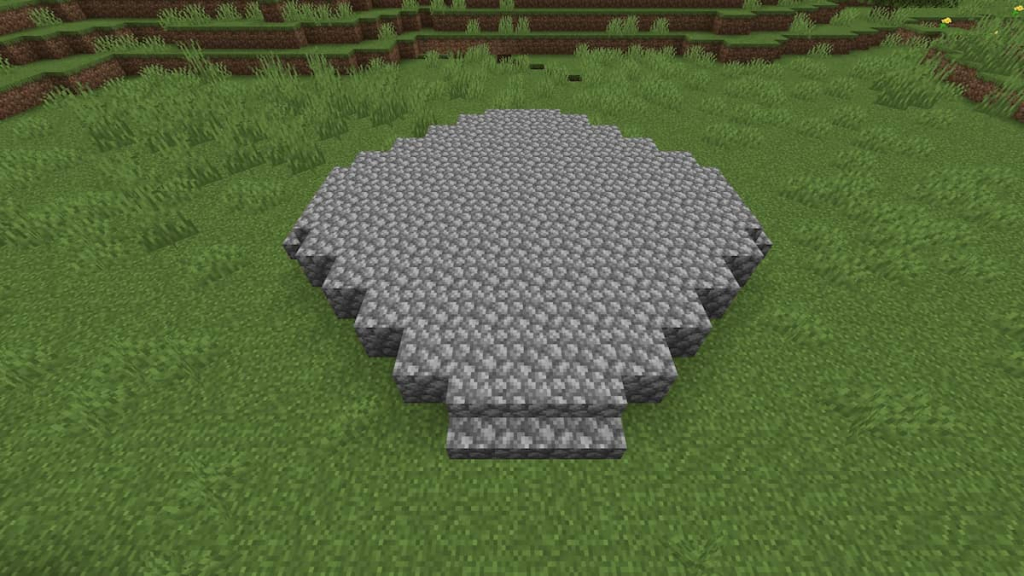
Stairs will be placed on all four sides where the blue and black concrete blocks are. There will be three stairs on each side, requiring a total of 12 cobblestone stairs.

After placing the stairs, the base will look like this.
Adding the Oak Fence Rails
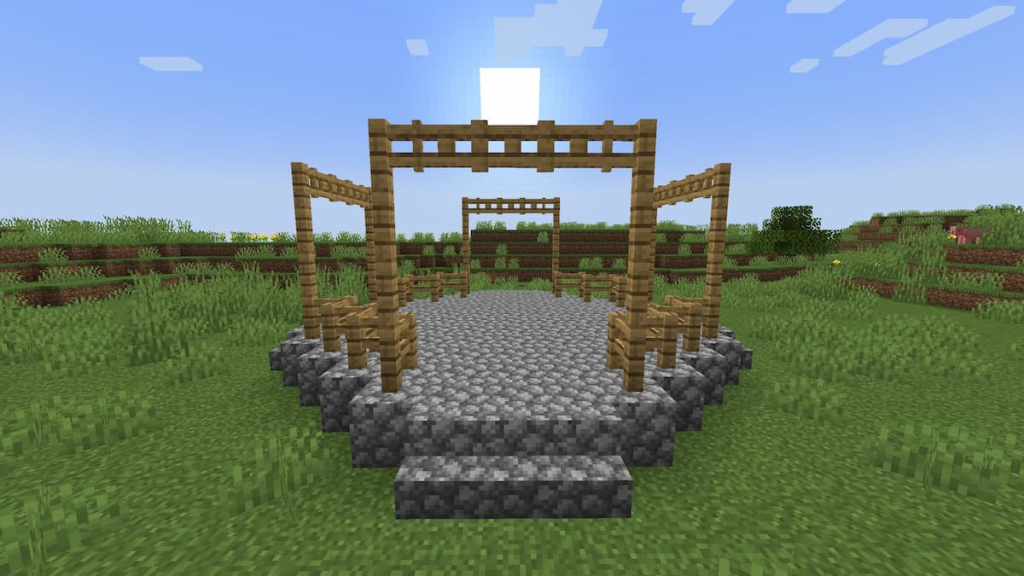
Start by placing the 28 oak fences on the edges of the base between each set of stairs. There will be seven oak fences on each corner forming a zig-zag pattern.
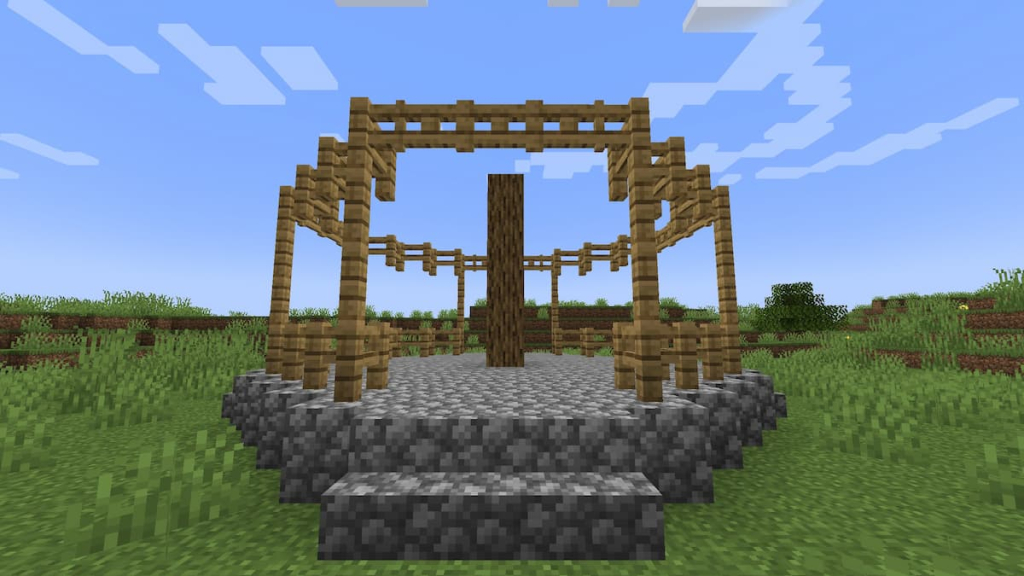
The fences on the side of each staircase need to be elevated to a height of four blocks. These will serve as support for the roof.

Connect the fence pillars with oak fence gates above each staircase. When placing the fence gate in the center, remember to crouch while placing it. This will allow the fence gate to be placed rather than opening the other gate it is being placed against.
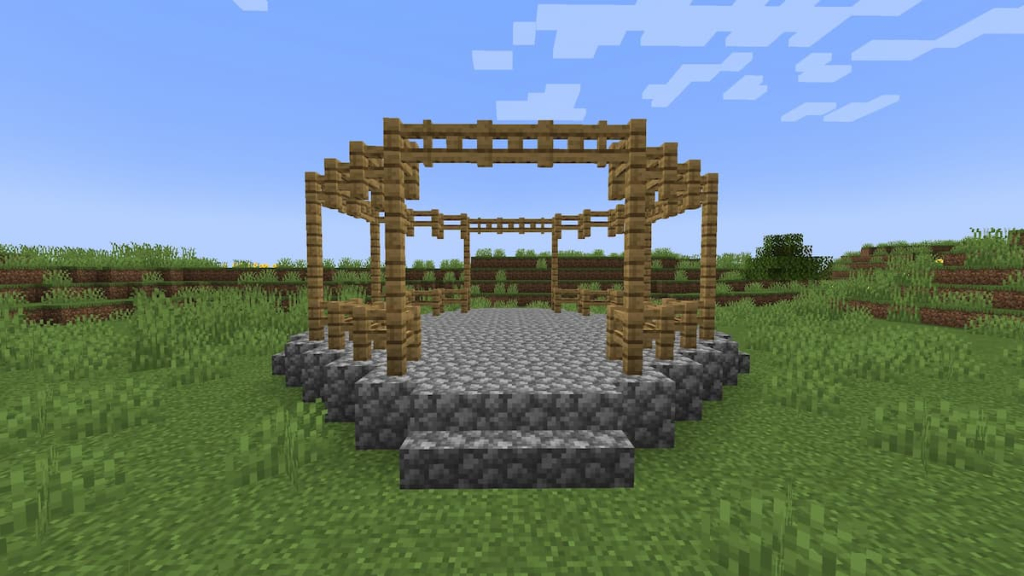
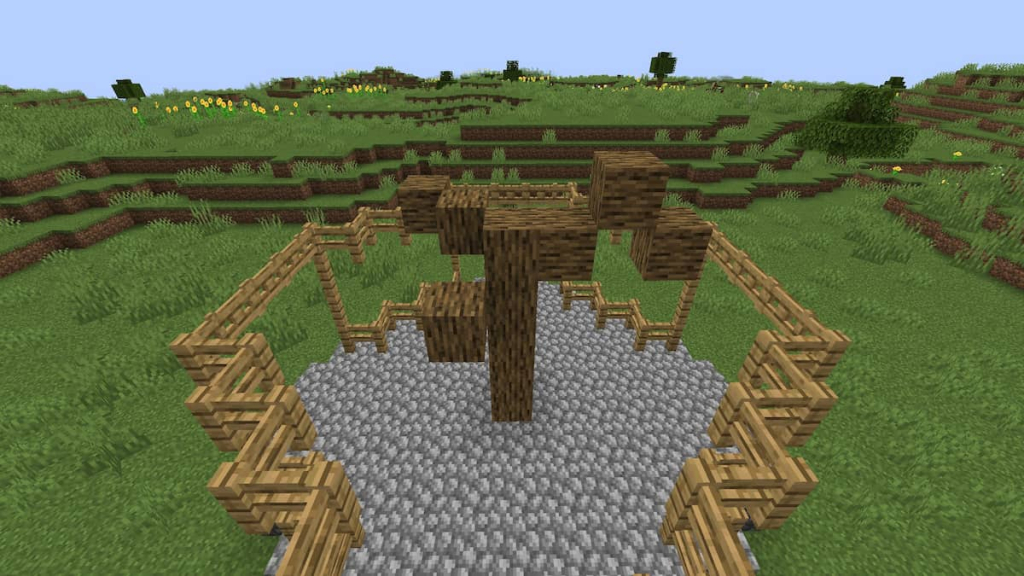
Lastly, connect the pillars with the remaining fences in the same way that they are connected on the bottom.
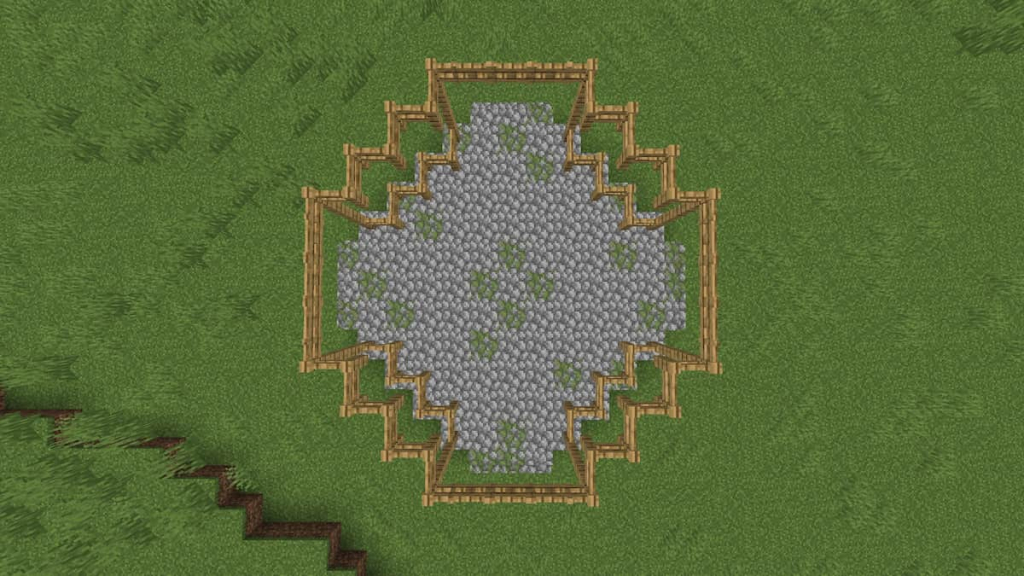
From the top, it should look like this.
Building the Tree in the Center
To build the tree, you’ll need to find the center of the gazebo. For a gazebo with an 11-block diameter, there should be five blocks between the tree and each staircase.
Build the tree up to be five blocks tall.
Lastly, build a few branches to add some detail to the gazebo. This can be done in a variety of ways—I chose to build three small branches extending out from the top two blocks of the tree.
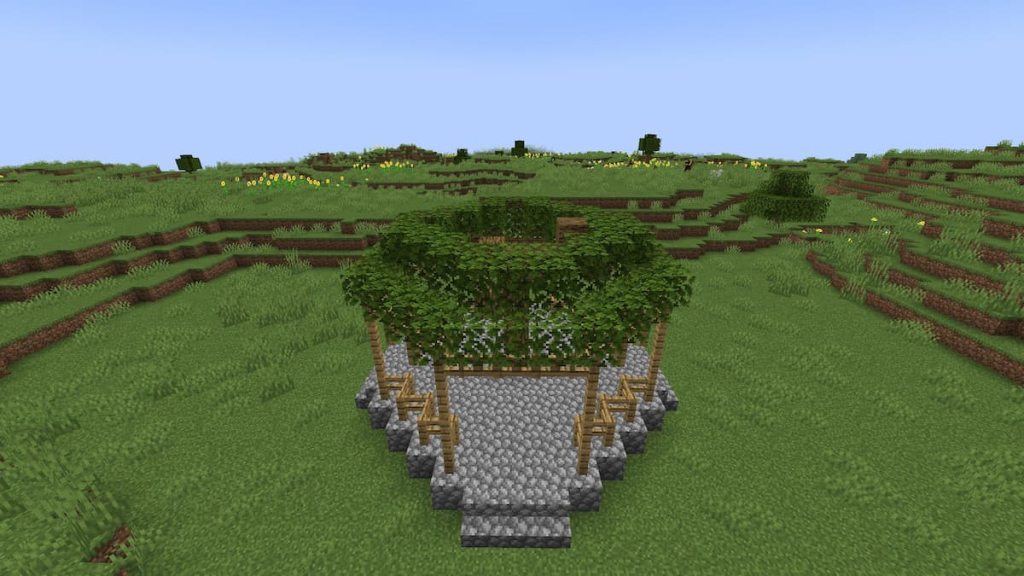
Adding Oak Leaves to the Gazebo
There are two main ways to add the oak leaves to the gazebo. The first method involves building a multi-layer base, while the second involves a single-layer base and a lot of randomized leaf placements.
Multi-Layer Leaf Placement
This method starts by creating a border of oak leaves on top of the fences circling the gazebo.
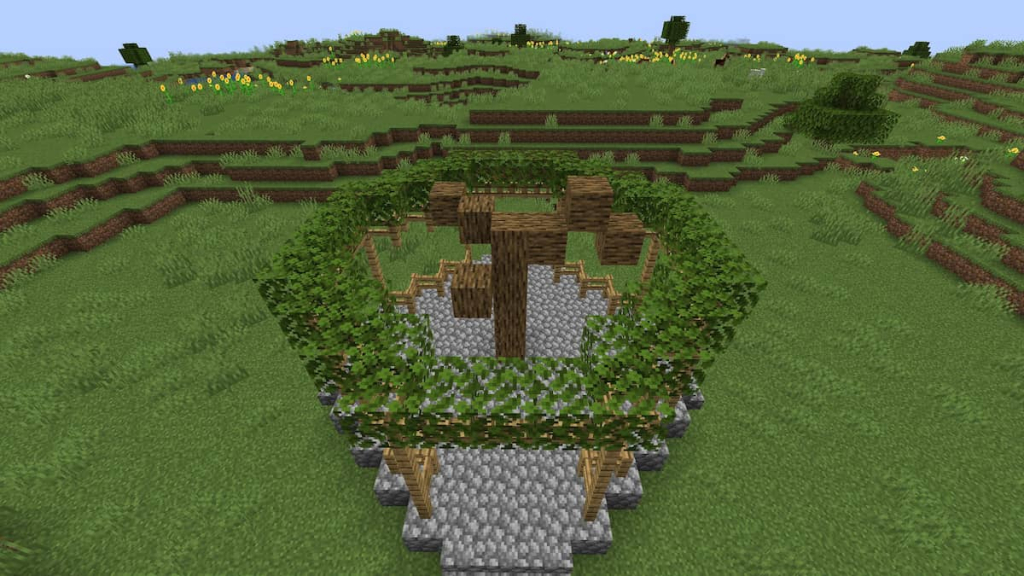
After the first layer is completed, a second layer is built one block higher than the first layer
From here, you can continue creating new layers to build a more structured tree. You could also fill in the second layer and add oak leaves randomly to construct a more natural-looking tree.
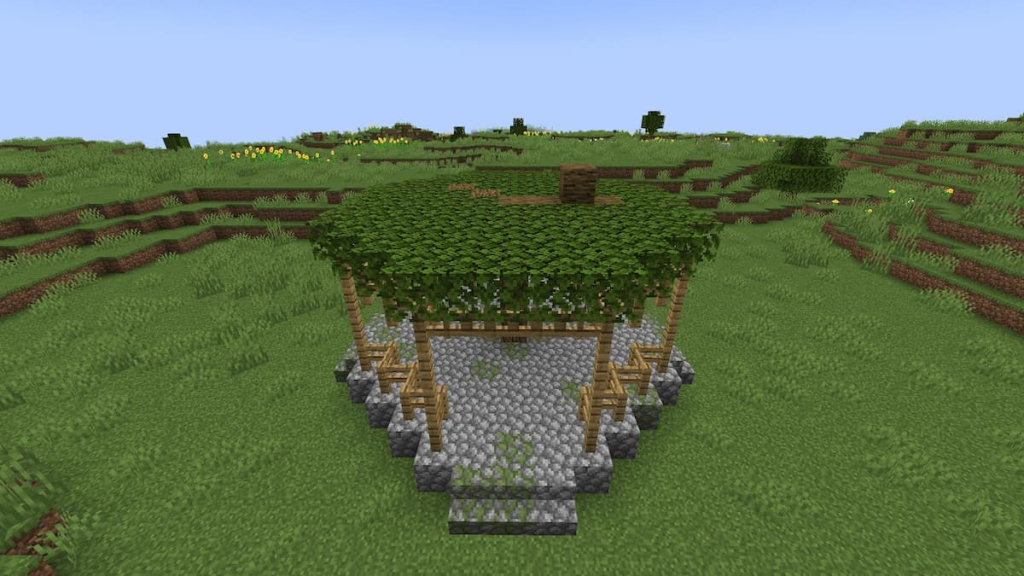
Single-Layer Leaf Placement
This method creates a less structured tree than the previous one, but it starts in the same way. Place a border of oak leaves on top of the upper layer of oak fences, then fill the layer in! If the tree’s branches poke through this layer, simply place the leaves around them.
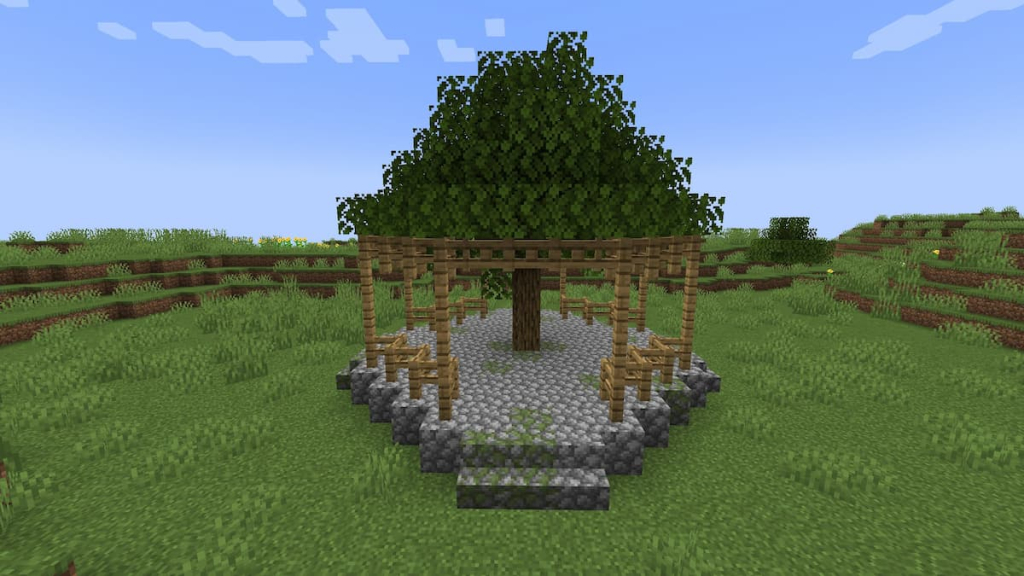
From here, place oak leaves all over until you’ve created a tree you’re happy with! Make sure to examine how the tree looks from each side to ensure it looks good from every angle.
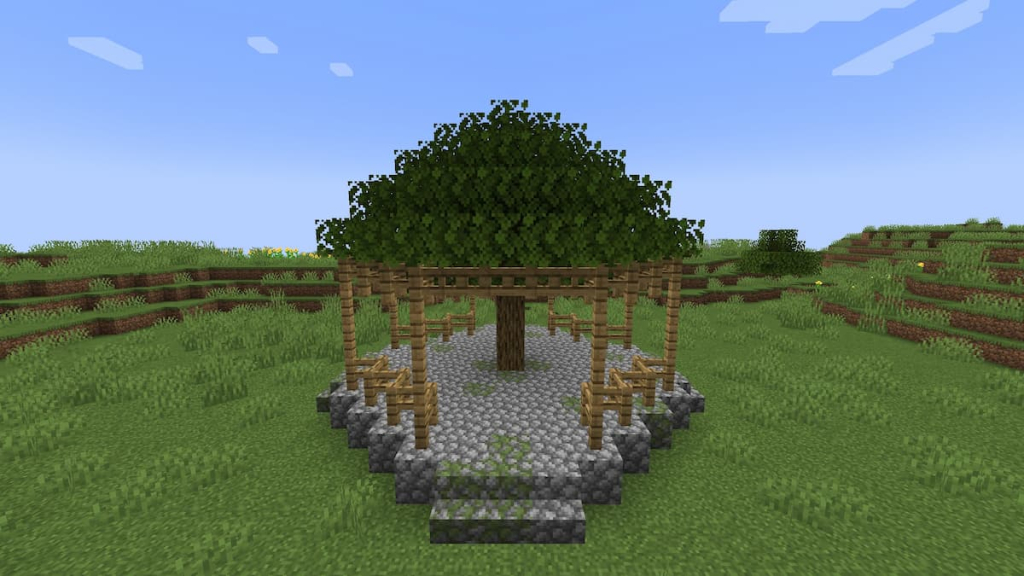
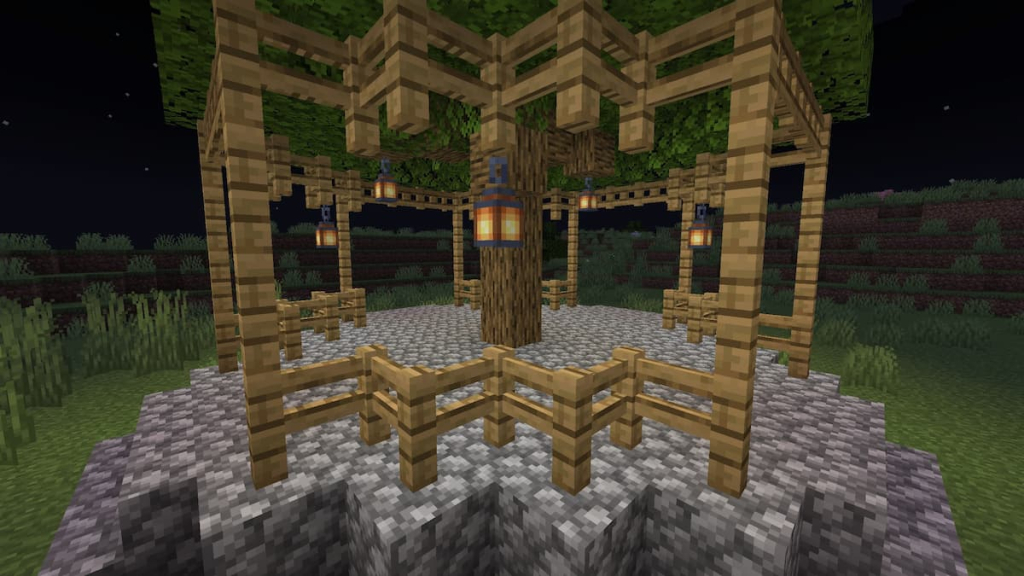
Adding Extra Details to the Gazebo
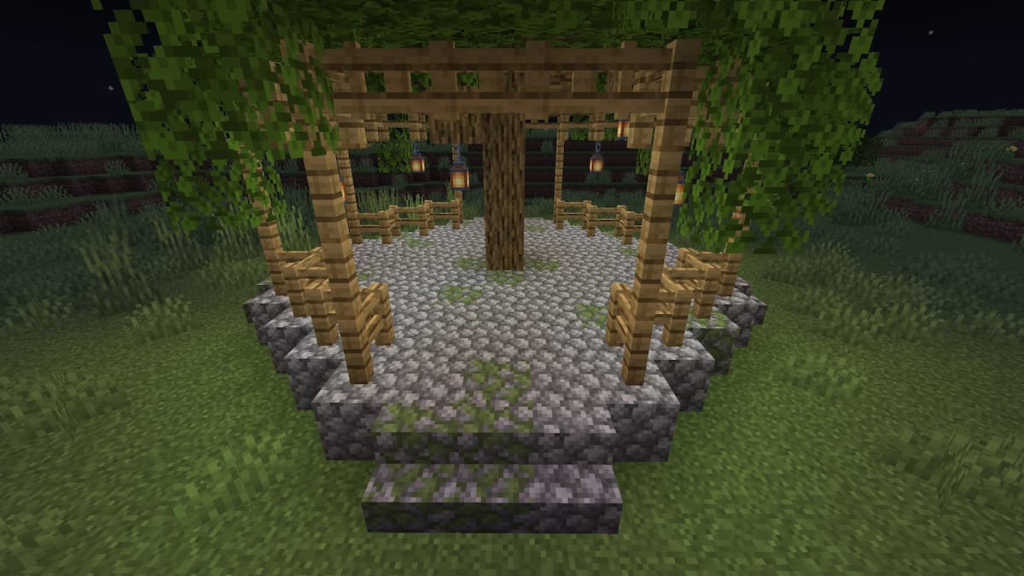
The most important detail to add is lighting! I prefer lanterns, as they can hang down from the center fences as well as from the tree’s branches.
Additionally, you can add oak leaves extending outside of the oak fence railing to make it appear as if the tree is growing around them.
The last way to add interest is by converting some of the cobblestone blocks, stairs, and slabs to their mossy cobblestone counterparts.